

Hey Everyone! I hope you all are enjoying your week! Soon I will have a new recipe for you but today I wanted to share a quick post (let's face it, I'm long winded and there will probably be nothing short about it) on how to start growing your own pineapples!
Every time someone sees my pineapple plants they cannot believe I grew them. Then, they REALLY can't believe it when I tell them I grew them from a pineapple I picked up from our local grocery store. The best part is, it's REALLY easy to do! The biggest thing you need for this is a little patience! These also make great gifts. The hubby and I gave one to my father-in-law for Father's Day and he loved it!
Maybe this is my inner mother coming out but I love gardening. It brings me such joy. Seriously, there is something about going out and seeing all that hard work you have done... Not that gardening is really that hard... I pretty much just go out and water my plants every couple days. I like to think I'm really accomplishing something though.
Supplies:
-pineapple from the store (you want it to be as green as possible)
-clear glass
-water
-pot (or a place in the ground)
-soil
Pineapples are one of the best fruits you can grow in a container. They are perfect for people like me who live in a rent house and can't have a "real" garden. They also grow equally as well in the ground so plant yours however you would like!
When you are in the grocery store, you want to find the pineapple that is as green as possible. Normally, if you were buying the pineapple purely to eat you wouldn't want to do that. A pineapple is ripe when the little grooves on it start to turn yellow. This is when a pineapple is at it's sweetest. If you buy a pineapple like that to grow, it will not produce roots because it has been off the vine to long. Trust me, AS GREEN AS POSSIBLE! I tried this with a ripe pineapple and it did not work out. Here is a picture of mine.

To take of the green stem, grab it firmly in one hand and twist. You should be able to twist it right out of there. Put the fruit part over to the side to cut up and enjoy later. Next, cut off the little bit of pineapple left on the end until you can see little spots in the yellow part. Those are the roots and you want them exposed to water.

Next, take the little green leaves at the bottom and peel them off one by one until the roots are exposed. This usually ends up being about 10-20 leaves. Here is a picture of one of the leaves peeled up and then another of the plant with the leaves peeled off.


The roots will poke out through those levels you created when you peeled the leaves off. Next, put your pineapple in a glass with just enough water to cover the bottom where you exposed the levels.

Next, place your pineapple plant in a sunny window and watch it grow! The roots look like little white worms and will slowly emerge from the levels. Below is a picture of what the roots will eventually get to. This takes a couple weeks.
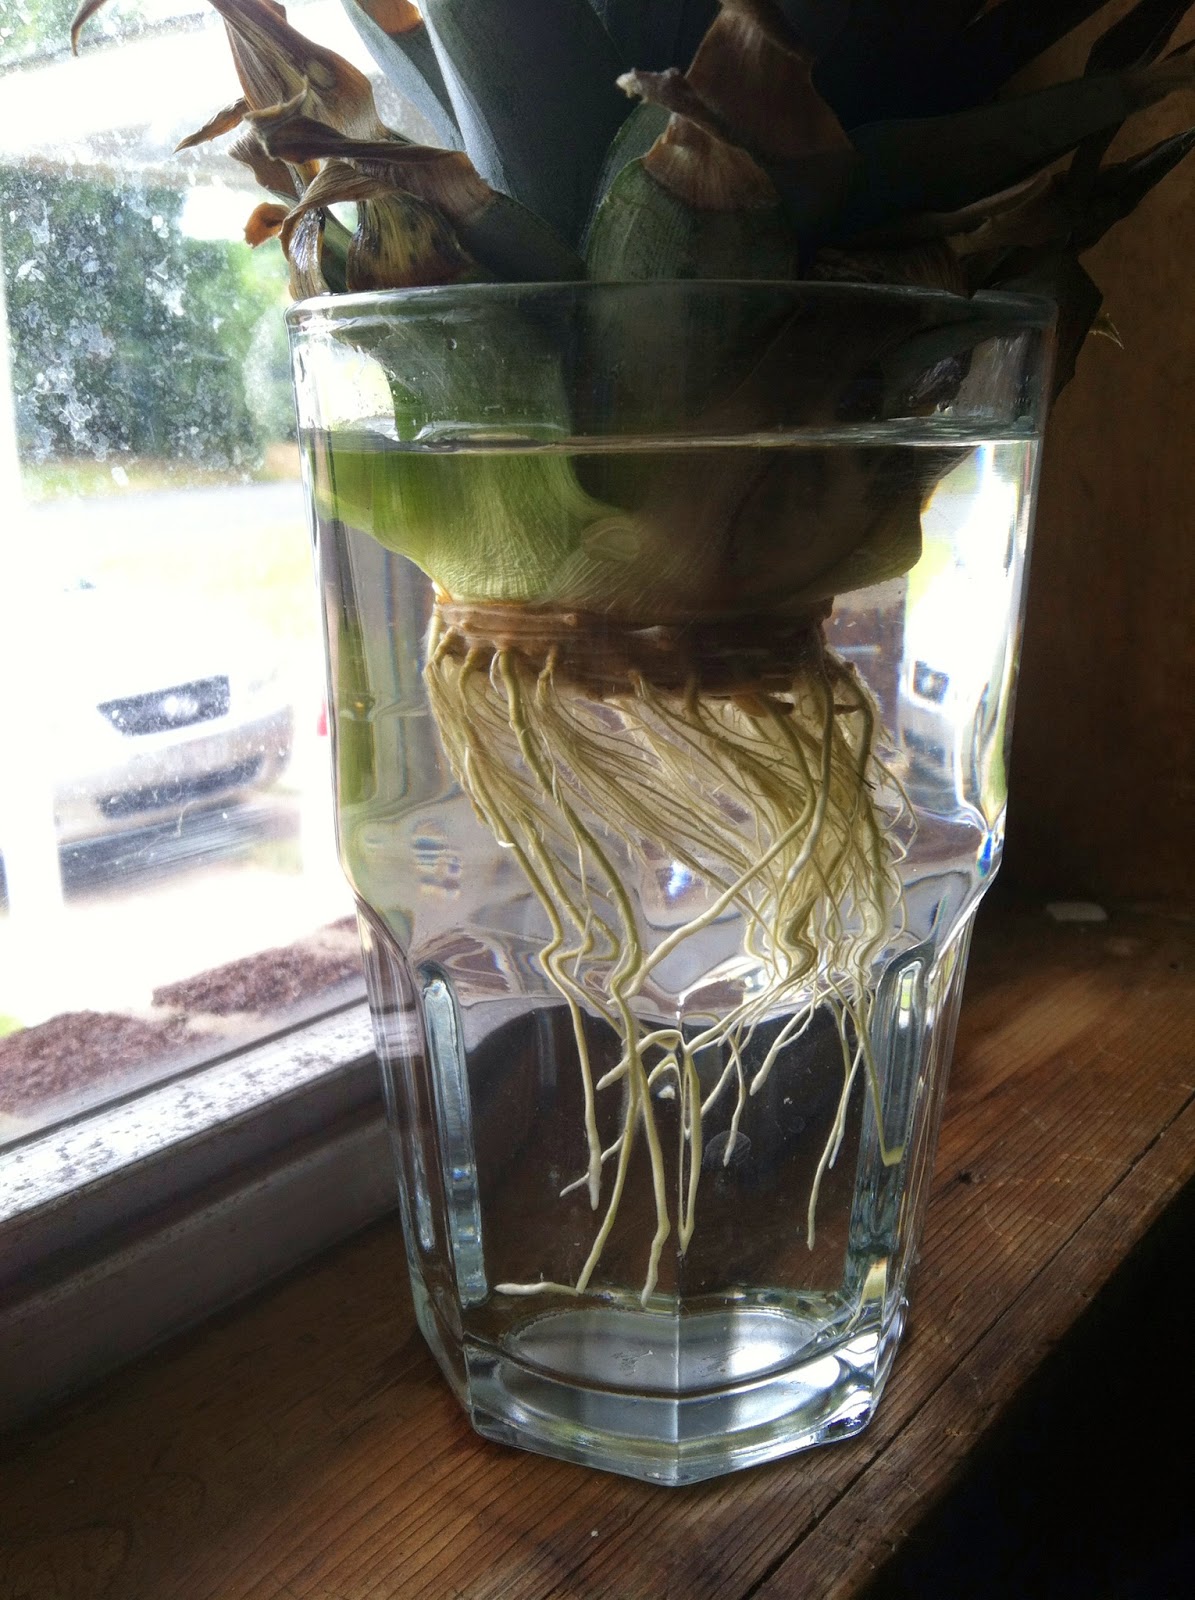
You will know the plant is ready to put in the soil when your roots have little white sprouts coming out of them. They kind of look like little hairs. Here is what your plants look like when you have just planted it. Don't worry if the leaves on the outside start to turn a little brown (you can see that in both the cup picture and the planted picture).

Once your plant gets settled it will start growing! Below is what my first pineapple plant has grown to. Isn't it beautiful? As you can see, the leaves grow out of the middle so the ones on the outside are the oldest. That's also where the fruit will grow out of (that part takes a while).

Water your plant about once a week to keep the soil moist and most of all, enjoy it!
Good luck! Let me know in the comments below what your favorite thing to grow is!


