Showing posts with label Party Planning. Show all posts
Thursday, October 24, 2013

Pinwheels


I'm a bad blogger lately. I know... it's been about a millennium since I last posted. Every night when I get home from work I have the intention of posting, but then I settle into the couch and am usually extremely lazy for the rest of the night. Excuses... I know, but that's really what I'm doing. The extra weight on my behind is there for proof.

Also, I apologize in advance for the pictures. I took them at about 5 am when the lighting wasn't the greatest. Don't let the crappiness take away from the food, it's good.

Since Halloween is a week from today (wooh!) I decided to bring myself out of the funk and give you a crowd pleaser for your Halloween party. Don't forget to check out my Halloween Party post from last year and the Recipes tab for more ideas!

These go the fastest at every party I have ever taken them to... except the two parties that I forgot to set them out. Try em, you'll love them! The great thing about this recipe is that you pretty much just put in whatever you have. It's one of those everything but the kitchen sink kind of things. The only thing mandatory is the tortilla, cream cheese, and sour cream!

Ingredients:
1 package of tortillas
1 block of cream cheese or neufchatel cheese
1 cup sour cream
1 Tbsp. Worcestershire sauce
Garlic powder (optional)
Minced onions (optional)
whatever else you have in your fridge (I usually add in some ham or bell peppers but you can literally put in whatever you want!)

To make these, mix up all your ingredients. You can add whatever seasonings you want, but I usually just keep it simple with some garlic. Once you have your ingredients mixed, drop a dollop of your mixture onto your tortillas and roll up.


I also always add a little extra to the ends to make sure the tortilla is completely filled. This also makes the end pieces extra good! This does use a lot of your mixture though so if you want your pinwheels to go further (have more of them), just cut off the ends.


Next, I cover them and put them in the freezer for about 45 minutes-1 hour. This helps them harden up so when you cut them they don't squish down flat. This isn't mandatory, I just think it makes the final product look better. They may be a little bit frozen but they will unfreeze by the time you finish cutting them all up.

Once you have them cooled down, pull them out of freezer and cut them into 1/2-1 inch pieces. Arrange on platter and wah-lah, you are done!


Like I said earlier, I'm a bad blogger and have bad pictures for this post. This is the only picture I got of the final product. Next time I make these I will update the pictures but for now, this is what we have! Enjoy! :)

Thursday, August 15, 2013

Cream Cheese Appetizer


Hey Everyone! I have missed you lately (hopefully you have missed me!). I started my master's internship so things around my house have been CRAY-CRAY (I learned this word from a women I started working -with.... I think she might be "cray-cray"). I'm still relatively busy adjusting to my new schedule so today's post will be quick! Even though its quick, anyone who has had this appetizer/dessert/party food/deliciousness knows its not lacking anything in flavor. You can hardly call it a recipe because it takes about 60 seconds to "make" but you will be glad you did.

Don't be dismayed by the directions. It sounds a little weird but I promise you that you will be in love. My hubby gave me weird looks about trying it because he thought it "sounded weird" but then he kept coming back for more. I don't know why he still doubts me!

Ingredients:
8 oz. block or cream cheese (or neufchatel cheese)
1 jar jalapeno berry jelly (pick any variety you like! You can find it at any store, you may just have to ask where!)
box of wheat thins

To make this, put your cream cheese on a plate and cover it in the jelly. Next arrange your wheat thins around the block to make it look pretty (please make it prettier than mine... I was in a hurry).

That's it! Use your wheat thins to scrape up a little jelly and some cream cheese and ENJOY... unless you aren't ready for this jelly (I don't think you're ready for this jelly!).... sorry I had to. :) If you don't get that reference then never mind, just go eat your food.


Wednesday, July 3, 2013

My Favorite 4th of July Pinterest Posts


Hey Everyone!

I hope you are preparing for an awesome 4th of July tomorrow! The hubby and I are extremely excited because we have the day off work. We are planning on spending the day relaxing, we can't wait!

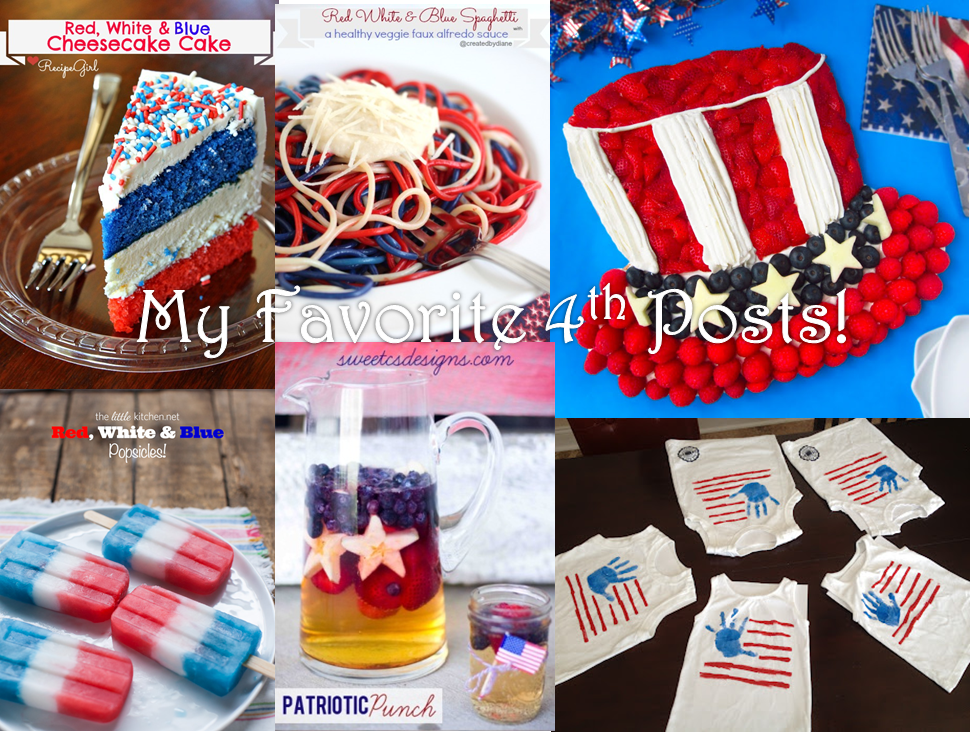
Today I thought I'd share with you some of my favorite 4th of July posts from Pinterest. Anytime I'm looking for an idea, Pinterest is my first stop and it didn't disappoint with the 4th of July posts! I have included a few here on the blog but there are TONS more on my 4th of July board on my Pinterest page. Please check it out!

1. Patriotic Punch from Sweet Cs Designs


I LOVE this stuff. It is so pretty and would go perfectly with any 4th of July party! Plus, you could always crank it up into an adult beverage if you wanted! :)

2. Red, White, & Blue Popsicles from The Little Kitchen


Living in Texas, we NEED something to cool us down, especially in July. These popsicles are perfect for that! They are perfect for kids (or adults!) to enjoy at any 4th of July party.

3. Flag Tank tops from Look What Erin Made


These little tank tops are the curtest and would be the perfect attire for a 4th of July party. The post is for kids but adults could rock them too!

4. Red, White, & Blue Cheesecake from Recipe Girl


This is BY FAR one of my favorite Pinterest finds! It's so cute and will have your guests thinking you are a professional! The directions are easy to follow and make an awesome product!

5. Red, White, & Blue Spaghetti from Created by Diane


Trying to be patriotic and maintain your healthy lifestyle? This is a wonderful post to help you do that. These colored noodles are so cute and the sauce is similar to the Cauliflower Alfredo Sauce I posted a few weeks ago. Very cool!

And last but not least....

6.4th of July Fruit Pizza by Hungry Happenings


I LOVE THIS! Fruit pizza is one of my favorites and this is one of the cutest fruit pizzas I have ever seen. This would be a great addition to any 4th of July party.

There ya have it! Don't forget to head on over to my 4th of July Pinterest board and check out some more awesome 4th of July finds!

Have a happy 4th of July!


Thursday, May 2, 2013

10 Cinco de Mayo Recipes


Hey everyone! With Cinco de Mayo coming up I thought I'd share a bunch of recipes in 1 place! I hope this lists helps you with your Cinco de Mayo party planning!! Click on the name of each recipe (not the picture) to get the directions!

Breakfast:

Breakfast Quesadillas:
 
Migas:
Appetizers/Snacks/Soups:

Guacamole:

Queso:

Chicken Tortilla Soup (Crockpot):

Main Dishes:

White Chicken Enchiladas with Salsa Verde Sour Cream Sauce:

Chicken for Burritos & Tacos (Crockpot):

Sides:

Spanish Rice:
Dessert:

Sopapilla Cheesecake Pinwheels:
Honey Bananas:

I hope you have a great Cinco de Mayo this weekend and make yourself lots of treats!
Thursday, March 14, 2013

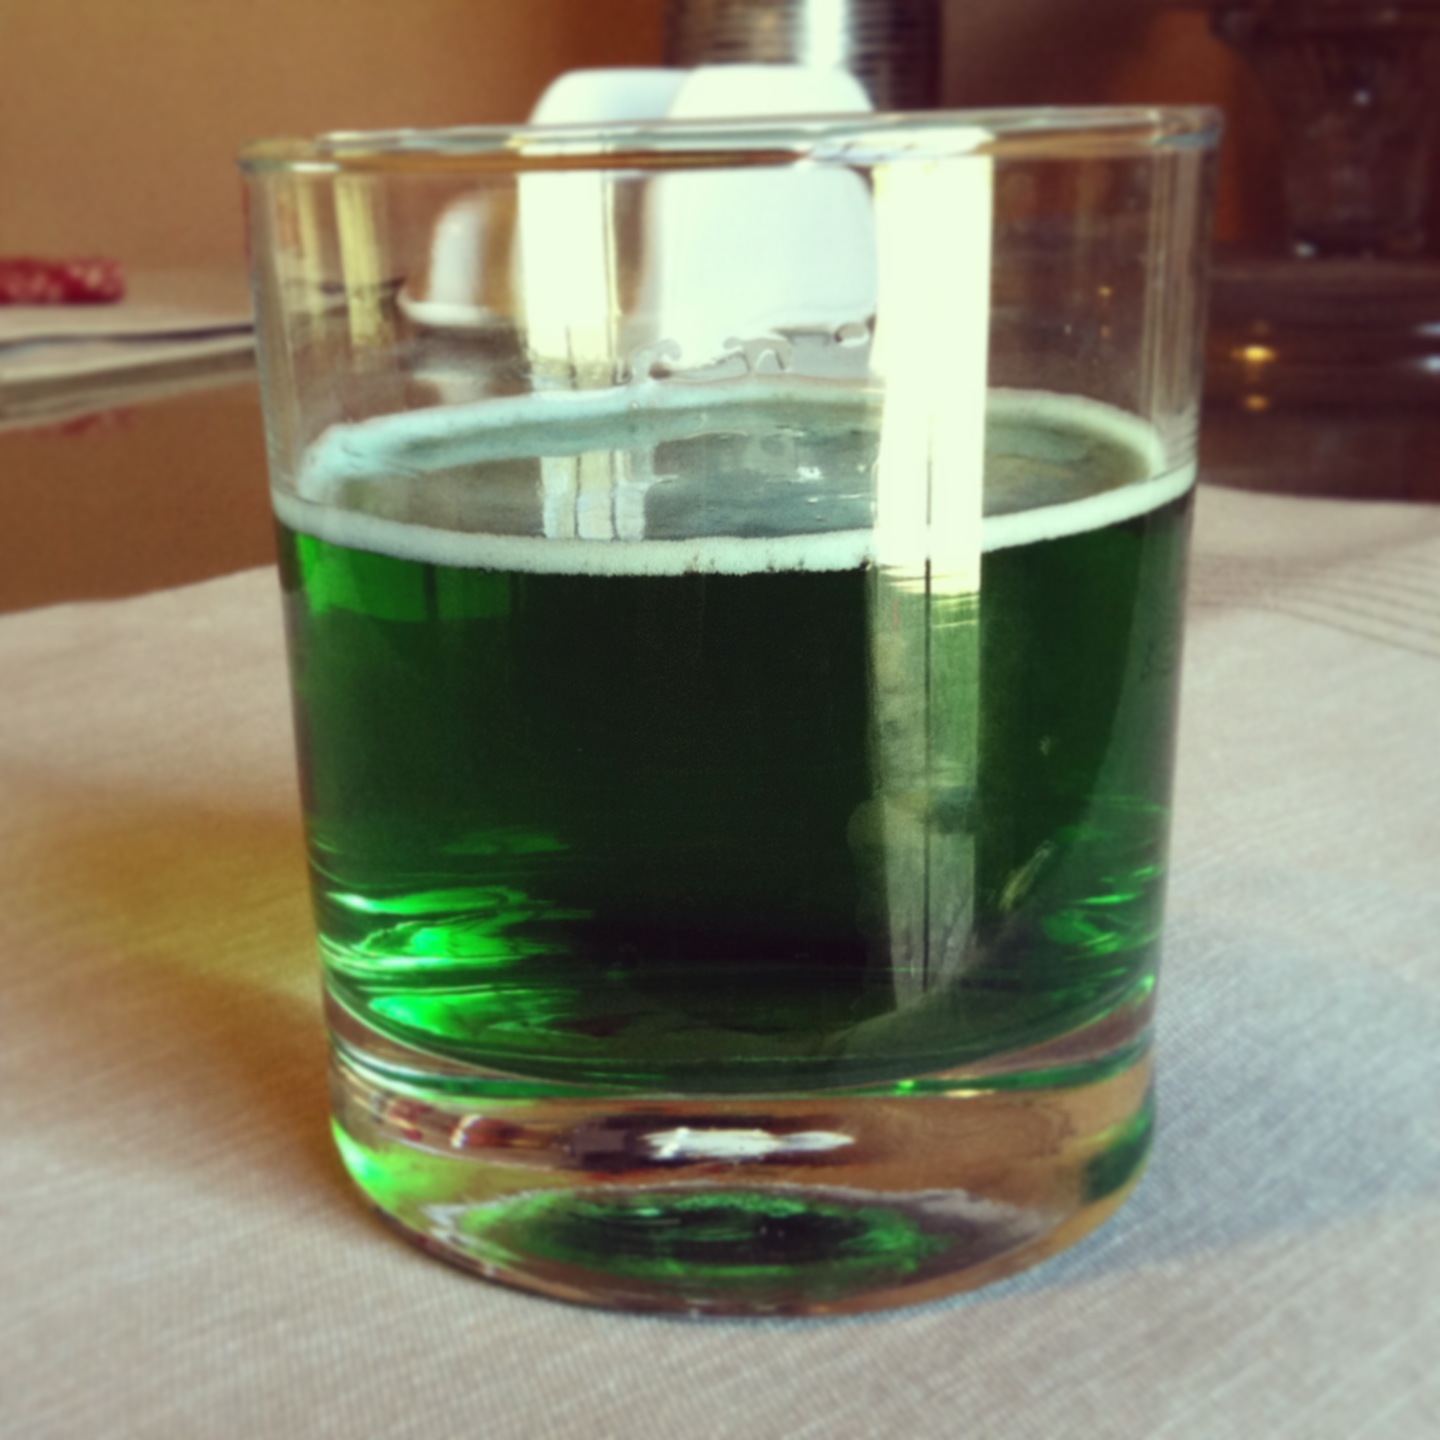
St. Patrick's Day Green Beer


With St. Patrick's Day coming up this weekend, I thought I'd share a lovely little "recipe" with you! Now, I'm not Irish, BUT I love a St. Patty's Day celebration as much as the next girl. I've always thought it was so cool how bars serve green beer, I just never knew how easy it is!

Ingredients:
3-5 drops of green food coloring
1 can or bottle of your favorite beer

As most beer is, this is ALWAYS better in a frosty mug so if you have a mug on hand, stick that sucker in the freezer!

There is really only one trick to doing this: pour the food coloring in first. If you put the beer in first you will end up stirring your beer to mix in the food coloring... which will make it flat. Flat beer is gross PURE DISGUSTING. Just drop your food coloring into your mug and then pour in your beer (at an angle so it doesn't get foamy!!).

It doesn't matter if you use light or dark beer, you will just have to use more food coloring for darker beers. I used Leinenkugel's Lemon Berry Shandy since it's pretty much the best beer I have ever had. Seriously, you should try some ASAP. I think it's a Polish beer so if you want to be a little more authentic, you should probably use something Irish (but it's my fav!!!). I also did one with Miller Lite, they both looked the same.


Anyways, here is a picture of your final product.


I didn't have a real mug so I used the one I have from when I visited Harry Potter World at Universal Studios in Florida (hints, the ButterBeer logo). I felt VERY grown up drinking beer out of a Harry Potter cup. :)


These would be great to make at your St. Patty's Day party!

Have a safe and fun St. Patty's Day Celebration!!!
Tuesday, January 15, 2013

Zebra Cake

Hey Everyone! How are you all doing today?

For Christmas I asked for cake decorating supplies. This is something I have been wanting to try for awhile, and finally after getting some awesome goodies for Christmas, I was able to try. My niece was coming into town to visit for the weekend, so I decided to try out my new toys by making her a cake! It turned out pretty cute and I can't wait to try it out again.

I saw this zebra cake idea a long time ago on Pinterest and honestly have no idea where it came from, so I don't know who to give credit to. Whoever came up with this, awesome idea!

Ingredients:
-1Box white cake mix
-Black food coloring
-Ingredients from back of cake box (usually eggs, water, & oil)
-Optional: Parchment Paper

Decorating Ingredients:
-Fondant (you can buy pre-made fondant in the cake decorating section of Walmart)
-Buttercream Icing (recipe toward the bottom of the page)

TIP: If you don't want to waste your time with the black food coloring OR you want a bigger cake, use chocolate cake mix for the black stripes in the cake.

Making a Zebra Cake is actually fairly easy. It doesn't take any longer than making a regular cake and it looks pretty awesome.

To start off, preheat your oven and mix your cake mix and ingredients together as directed on box. Next, separate your cake mix into two separate bowls and add black food coloring to one of them. Use as much food coloring as you need to make it as dark as you want.


Next, set your mix aside, and grease your cake pans. I used two 9 inch round pans, and lined the bottom with parchment paper to prevent sticking. I also sprayed both pans with non-stick cooking spray. I find this method works WAY better than the Crisco/flour method.

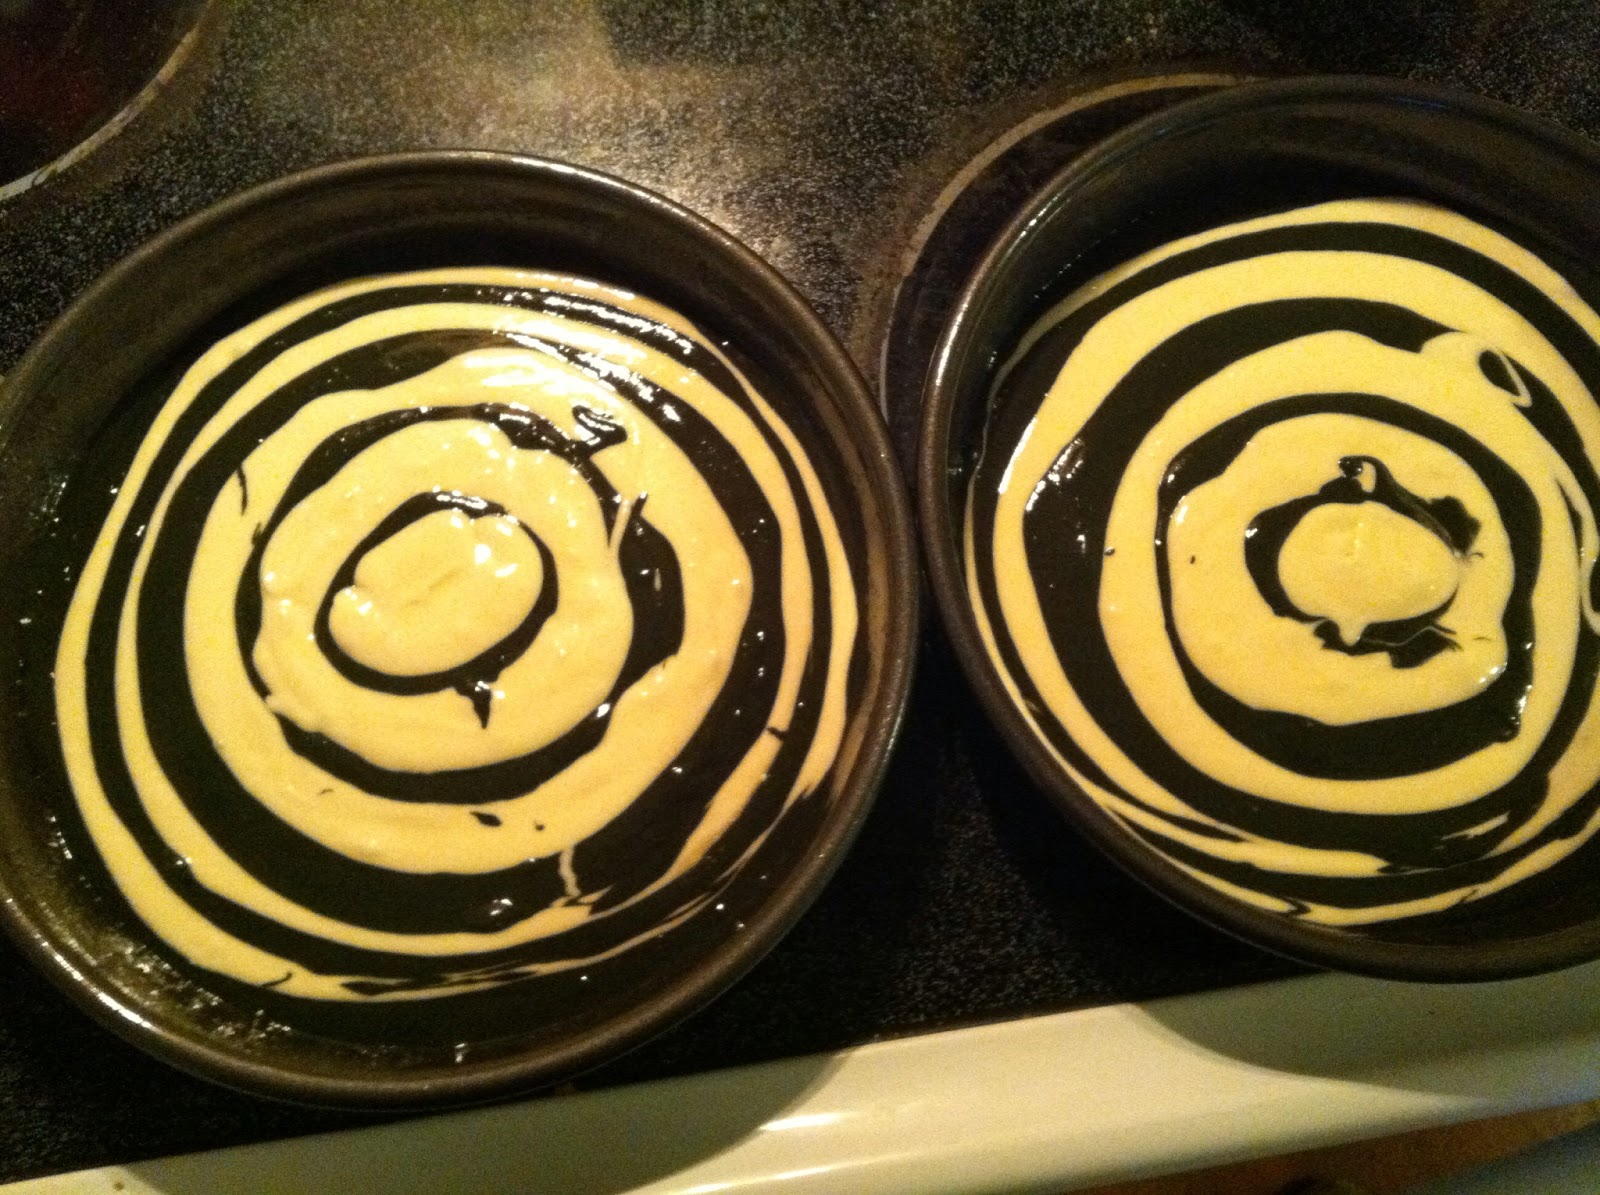
Next, drop about 1/4-1/2 cup of batter onto the center of each pan. It doesn't matter which color you start with, but I started with black.


Next, add the same amount of white cake mix into the center of the black. Repeat this process over and over until you use all your cake mix and have a nice bullseye.


Your cake mix should spread out on its own but it may need some help from you. After every couple rounds I would tap the cake on the counter and shake it back and forth some to spread the cake out more. You want to try and have your layers over lap as little as possible! Here are my finished pans before going into the oven.


And then after coming out of the oven (Bake according to cake mix directions). You will be able to see the zebra stripes when you cut the cake for serving.


Let your cake cool completely before decorating. Once cooled, you can decorate your cake however your heart desires!

I used buttercream icing and then covered the cake with fondant. To do this, level the top of your cake layers until flat. You do this by cutting off small layers from the top until the cake is level. Here is what mine looked like leveled:


Next, frost your cake by putting icing between the layers and around the whole cake. It doesn't matter is you get crumbs in the icing because the cake will be covered in fondant.


Next, roll out your fondant (about 1/4 inch) and cover your cake in it. Cut off any excess fondant around the edges.


Doesn't that look great already? I wanted to go one step further so I added some fondant to look like ribbon and a bow. As you can see in the picture, I cut the bottom of my fondant a little short, so I added some fondant balls around the bottom to cover it up. I made these by rolling the extra fondant scraps into small balls and sticking them around the edges with some extra buttercream.


Isn't that cute? My dog REALLY wanted some cake at this point, but we had to save it for my niece.


Here is a picture of the cake once we cut into it:


Do you see those beautiful zebra stripes? Pretty cool huh? You can also make this cake into any color Zebra you want. I have made a pink and purple striped cake before.

Here is my niece enjoying the cake, I think it's safe to say it was good. :)


Happy Cooking
& Enjoy!


Wednesday, October 31, 2012

DIY Halloween Party

Happy Halloween! I know there are a ton of differing opinions on this "holiday", many of which are religiously charged, but lets put all the away for a little while and have some fun! I love Halloween, not because I like to be scared... in fact I literally detest being scared.... I love it because it's an opportunity to spend time with friends, family, and people you need to catch up with, all while being silly and dressing up in the process. Not to mention, Halloween calls for some really great cooking and crafting! :)

Today I'm featuring all the things involved in the Halloween Party the official taste tester and I hosted last night. Get ready, this post is going to be packed full of fun things! The graduate program I am involved in is a cohort model which means we all go through the same classes together at the same time. Every year a new cohort comes in so, this campus organization we have works to unite all of us in this crazy journey. Trust me, it's always good to have a support system! Last night, everyone came over in the first and second year cohorts to enjoy some food and fun together.

As yall know, I love to cook AND I love Pinterest so this party was my opportunity to marry my two loves. As someone at the party said, Pinterest was all up in that party last night!! Don't worry about time either, most of these snacks take barely any time to make and can be made tonight before your Halloween party. :)

The first snack I had was the Monster Cake Pops from yesterday's post. You can find the recipe for that here. I decided to go with some variety and make some Ghost Pops too. These are made the same way, except they use white chocolate instead of green. To make these extra special, wrap a Styrofoam block in some black scrapbook paper, preferably one that looks "Halloweeny".


Next, I wanted to make some broomsticks I saw on pinterest here. These are SO cute and SO easy to make. I turned on the TV and had these done before the first commercial break. All you need for these is a bag of Reese's Peanut Butter Cups and a Bag of stick pretzels. To make them, you just unwrap the Reese's and stick the pretzel in the top. Here is a picture of them:


As you can see from the picture above, my broomsticks shared a tray with the creepy eyeballs I made. You can find those here.Out of everything at the party, these eyeballs were the biggest hit. By the end of the night that side of the tray had been demolished! To make them, you need white chocolate baking disks (same ones you use for Cake Pops), square or round pretzels, and chocolate chips. An optional ingredient is the brown or red sprinkle sticks (I used brown because I couldn't find any red). To make these, simply lay out your pretzels on a baking sheet and place one chocolate disk on top. Heat your oven to 350, and then cook your eyeballs for about 3-4 minutes (they are done when the chocolate is shiny). Once you take your eyeballs out of the oven, immediately put a chocolate chip in the white chocolate, pointed side down. Then, if you are using the sprinkles, add those on to look like eye veins. Here is what your finished product looks like:


The next thing I made were some witch hat cookies that you can find here. Out of everything at the party, these were my personal favorite. These are really easy to make too (theme here? I think so!). For these you need some Keebler Fudge Stripe Cookies, Orange Frosting, and some Hershey's Kisses. You can make your own frosting, but I was in a hurry and couldn't find orange food coloring so I just bought some. The time it saved was totally worth the extra $2 to me. Take your cookies and put them chocolate side up. Then unwrap your Hershey's kiss, add some icing to the bottom and stick  them together. These were quick to make too and were fabulous. Here are some pictures:


The final thing I made were some Bones. To make these, all you need are some mini marshmallows, pretzel sticks (I bought 1 bag for both the broomsticks and the bones and still had over half the bag left), and some white chocolate (I used the same white chocolate disks from the cake pops and the eyeballs). To make these, stick one mini marshmallow on each end of the pretzel stick and then dip in white chocolate. Then, place them on some white chocolate to dry for about an hour. Here is a picture of the finished product:


To finish everything off, and so we would have something to drink, I bought some orange Hawaiian punch and put it in a beverage dispenser. I highly recommend a beverage dispenser if you do a lot of entertaining. They are easy to use and make the presentation of your party look so much nicer. We got ours at Walmart for $20. I also, bought some blue Hawaiian punch and put it in a punch bowl with a frozen skull in it. I bought the ice mold at Target for $4 and it really made the punch look cool. I added a few gummy worms into the water before I froze it and it turned out very colorful! Also, you can use the mold year after year if you are careful removing the ice! Here is a picture:

 
For our main dish, I picked up a 6 ft sub from Walmart and some chips. These are fairly affordable at $28 for 30-40 people. That's less than $1 per person! Not to mention, it's a great conversation starter when people first get there and notice it. The table we had would only fit 4 feet of sub at a time, so we just kept the other part in our fridge. All the veggies you see in the picture come with the sub when you order it, and then I picked up some chip bags to go with it.
 
 
So, to put it all together I have included pictures of the whole thing at the bottom along with pictures of our guests. Everyone seemed to enjoy themselves and the snacks!
 
The spread
 
Poor Jeremy, he was the only guy there from the whole program!
 
We had a costume contest and my friend Nancy won in her Frog costume. I picked up her trophy at Target for $2.50. I would highly recommend doing the costume contest, it really gets people into the party for not a lot of money!
 
Maggie, although not thrilled about her costume, was a cat getting eaten by a shark.

I was a peacock and the official taste tester was Brutus. Here is a picture of the back of my costume, which I am proud of because I made it!


Happy Party Planning
& Happy Halloween!!