Showing posts with label Home Decor. Show all posts
Tuesday, September 17, 2013

Fall Front Door Decor


Here in Texas it's hot. Especially here in South East Texas where it's so humid you literally feel like you are living in an armpit. To say the weather is unpleasant is an understatement to say the least. Since we Texans deal with this for about 8 months (which is at least how long our summer is) we are all anxiously awaiting the arrival of our long lost friend fall.

This weekend the hubby went on a camping trip to test out his manly skills so I decided to have a little fun :). When the husband is away, the wife will play! I decided if I decorated for fall, maybe it would decide to visit a little early (fingers crossed).

Now, when we moved into the house we currently live in, it was in BAD shape. Seriously, I'm pretty sure the last people that lived there hadn't done any cleaning, yard work, or home improvement in about 10 years because it was NAS-TAY. We are working really hard on it and the house is looking a million and one times better, but one thing that still needs a lot of help is our front porch. Just check out the before picture below and you will know why I thought this was the perfect place to start with my decorations.


So, to start off I went on a little browsing trip to Wal-Mart looking for some supplies to make my fall decor. I actually found quite a bit of stuff which was surprising to me considering the Wal-Mart in our home town is usually extremely picked over and unorganized. I must have caught them right when they were putting everything out. All in all this decor project cost less than $50 and I think it came out pretty darn cute!

To start off, I knew I needed a wreath. I already had a bunch of wooden wreaths left over from our wedding (enter 8 wreaths that are taking over our guest room) so I was good there but I still needed decorations to g along with it. Luckily, I found some leaf sting type things (sorry my description is failing miserably.... just check out the picture) for about $2. Two came in a pack so I picked that up and went on my way. If you don't have a million wreaths left over in your guest room you can pick one up at Hobby Lobby for $5.


Next I found a cute welcome mat for $10 (not really fall, but still cute) and some plastic pumpkins. Plastic pumpkins are  SO MUCH CHEAPER and are better than real pumpkins because they won't rot. I found a nice green one for $4 and some little ceramic ones with sayings on them for $2.


Finally I found a cute little scare crow pot holder for $14 and an orange colored plant to go with it for $3. I already had some pots at home but if you don't have any, you can get one for about $2-$3.


With all my fall goods (and a little more!) I was on my way home to decorate!

To start, I grabbed my wreath and attached the leaves. You can use whatever you want to attach it. I used floral tape and just hid it behind the leaves so it wouldn't show. I also found a little wooden W in my craft box that I stuck on there (if you buy these they are about $1). The wreaths still had green tull bows on them from our wedding so I left that on there and fluffed it up a little.


My little ceramic pumpkins were already ready to go, but I still wanted to fluff up my green plastic pumpkin a little. Since I LOVE monogramming things :) I decided to draw a little W on it. It was quick and looked so cute (if you ignore that it was slightly crooked). I used a white paint pen for this but you can also use regular paint or a sharpie (just whatever you have lying around).


After I finished the plastic pumpkin it took about 5 min to set everything up. This was by far one of my favorite crafts because it was so simple AND it barely took any time at all. I was done with this in less than 30 min (including shopping time) and was ready to lounge on the couch the rest of the day. :)


I hope you enjoy decorating for fall as much as I did! The final price on this was about $39, take that Martha Stewart!
Friday, July 12, 2013

DIY Succulent Garden


Hey Everyone!

I have decided to start sharing gardening tips and tricks with you because my little garden has been quite successful! This was my first year to try my hand at gardening and it has worked out really well!

Today I'm sharing with you how to make a succulent garden. Succulents are pretty much the cutest little plants in the world. They are so tiny but have so much character at the same time. When I was buying mine the cashier had never seen them and though they were precious! My hubby was gone all week in Vegas (lucky!) so I decided to do a little project as a treat to myself. I'm so glad I picked this!

I have been wanting to make one of these for awhile but I was nervous about it until I saw this tutorial from Kala over at My Breezy Room. She made it look so easy so I knew I could do it! The project ended up taking about 5 minutes total to complete and it has already added so much character to our house. I can't wait to make another!

Succulents like bright indirect light so find a nice window to put them in after you make them. If you put them out directly in the sun it will scorch them because they are very fleshy plants. They are also really easy to take care of, all they need is a little water when the soil gets dry (about once a week). In the winter you will want to take that down to about once a month in order to prevent root rot.

Supplies:
-Glass planting pot/dish (I got mine in the wedding section, I think it's actually for floating candles but whatev)
-Soil
-Succulents

Sorry all the pictures are kind of dark, I did this at night. Here is a picture of the glass pot I used:


I forgot to get a picture of the succulents before I planted them, sorry about that.

To make this little beauty, simply fill your pot with a small amount of soil to cover to bottom of the pot.


Next, place your succulents in one by one. You can use as many or as few as you like, but I wanted my pot to look full. I also tried to chose succulents that looked different to give the pot some dimension. It was fun picking them out, Walmart had about 20 different one to chose from! Here is a picture half way through:


Finally, fill in the spaces around the plants to make the soil even and water slightly to moisten the soil.


Isn't that so cute?! The little tiny cactus in the front is my favorite. The picture doesn't even do this thing justice because the little succulents are so cute and have so much detail.

I hope you enjoy making your own succulent garden, I can't wait to make another one!
Thursday, March 7, 2013

EASY DIY Home Decor

 
Happy Thursday! I hope everyone is enjoying their week.... and looking forward to Spring Break for those of you involved in the school system (**Happy Dance**).

Today I'm going to share with you a project that is SO EASY. It's seriously 3 steps. I saw this on Pinterest at one time but I have no idea where the original pin came from. If you know, let me know so I can give credit!

Some things you know about me:
1. I love to monogram everything/ put my new initial everywhere
2. I love the color green (see my wedding)
3. I love projects that are easy

SO with those three things in mind, let me introduce you to the easiest project ever.

Supplies:
-Wooden Initial
-Wooden Frame
-Spray Paint

Remember how I said this project had three steps?
1. Buy your supplies
2. Paint your letter and frame
3. Hang it on your wall.

I guess technically you could say buying your supplies is multiple steps because I got my letter from Hobby Lobby and the frame from Micheals..... but thats just a technicaility.

You don't have to go get an expensive pretty frame. Almost anything looks good with a little spray paint on it. I think the frame I used was $2-3.

I didn't include any step by step instructions because I didn't think it was really necessary. Here are some pictures after the painting.


And the final product on my wall. Sorry the pictures are dark, I took them at night!


Isn't that cute?

Happy Crafting!!
Monday, February 18, 2013

Upcycle: Spices Holder


Hello Everyone! :) I hope you are all having a wonderful day! For today's post I thought I'd share with you a very easy project I tackled over the weekend.

This all started when I decided I was going to make the most of our rent house. For those of you that rent, you know what I mean. It's really difficult to actually do any kind of decorating when you live in a rent house. They have so many rules and regulations that you basically can't do anything more than put things on the wall with thumb tacks. You can TOTALLY forget the idea of painting which is what in my opinion really changes a room.

I decided I needed to change our house. For anyone who has ever been to my house you know.... it's SO brown. The walls are brown, the carpet is brown, and pretty much everything we owned when we moved in was brown. Can you say drab? When we moved in I decided that it was so ugly that it was beyond hope, but recently I decided to change my tune and be a little more optimistic. I started with my Chevron Letter and have been trying to spruce things up ever since.

This weekend I decided to work on the kitchen/dinning room area. It turned out all the dinning room table needed was a few place mats, napkins and place settings. It's already looking much better and I have more ideas for the walls :) stay tuned!

As for the kitchen, the counter tops are (you guessed it!) BROWN and it's kind of hard to add color in a kitchen. Our plates are colorful put they pretty much stay in the cabinet the whole time so whats left? Well, to make a long post longer, I decided to add color where I could and I started with my spice rack.

Supplies:
Old Spice Rack (or cheap Walmart one)
Spray Paint

Anyone that cooks a lot (or a little) has at least some spices and storage is a perpetual problem. I didn't want to put them on a spice rack in our pantry because I wanted them easily accessible when cooking. When I bought our spice holder it was more out of convenience and price and less (or not at all) to do with the look of it. I think the price was about $5. I forgot to take a before picture of ours but here is a stock photo from Wally World.

 
So you see? White and brown does not equal a happy kitchen. The good news is, this is really easy to fix.
 
All you do, is spray paint your spice rack. Seriously, it's that easy. I would recommend using Rustoleom Spray Paint. I have found it to work the best. I only had to do one coat!
 
Before:
 
After:
 
Sometimes a simple idea is the best one! :) I flirted with the idea of adding a W in the middle since I love to monogram everything possible BUT I decided it would be covered up and wouldn't matter anyways. Here is a picture of the final product:


It looks awesome next to the yellow utensils holder I found at Target for $3. Who doesn't love decorating on a budget?!? :) Doesn't this make our kitchen a little less drab?
 
Happy Upcycling!
Tuesday, February 5, 2013

DIY Valentine's Decor - Love Story Sign


Hello Everyone! This is the first of a couple posts over some Valentine's decor that you can make yourself to decorate your house for Valentine's Day! It is very cute and something you will be able to use year after year.

I got this idea here.

Supplies:
Large block of wood (I got mine at Walmart for $8)
Red Acrylic Paint**
White Acrylic Paint
Red Paint Pin (or the color of the base coat you are using)
4 Push Pins
Optional:
-Stencil for Lettering (I got the whole alphabet for $3 at Walmart)
-Rhinestones

TIP: If you want to use this year around, use whatever color you want for the base coat!

To start off, push your push pins into the bottom at each of the four corners of your wood. The pins won't go all the way in, and the wood might be wobbly, but it will be stable enough for you to paint the whole thing. The push pins allow you to paint the sides of your wood without it sticking to your newspaper or whatever you are using to cover your work area.


Next, paint your wood with your red base coat. The good thing about working with acrylic paint is that is dries really quickly. By the time I finished painting the sides of my wood with my first coat, I was able to start my second coat. After the second coat, I went and did something else for about 15-20 minutes and in that time, my wood was dry and ready to go.


For the next part, pick a saying that you would like to put on your sign. I used "Every love story is beautiful, but our is my favorite." I just felt this captured the official taste tester & I's relationship perfectly. :) Feel free to use this same saying!

Now it's time to write on your wood. I CANNOT write pretty letters at all so I used the stencil. Make sure if you do use the stencil, you plan out your words so that they are even. If you are really good, you can draw your letters on free-handed. If you are REALLY REALLY good you can just go ahead and paint your letters on.


One I stenciled my letters on, I started painting them. I only used one coat for the letters and it looked just fine. Also, don't worry about completely staying in the lines of your stencil (you will see why in a minute!).


I would NOT recommend just painting through the stencil. It seems easier but when I tried it, it looked like this:


One you have your letters painted on, trace them with your paint pen. This makes your letters look cleaner and covers up any imperfections you may have.

 
One the paint pin dries, you can barely see it!

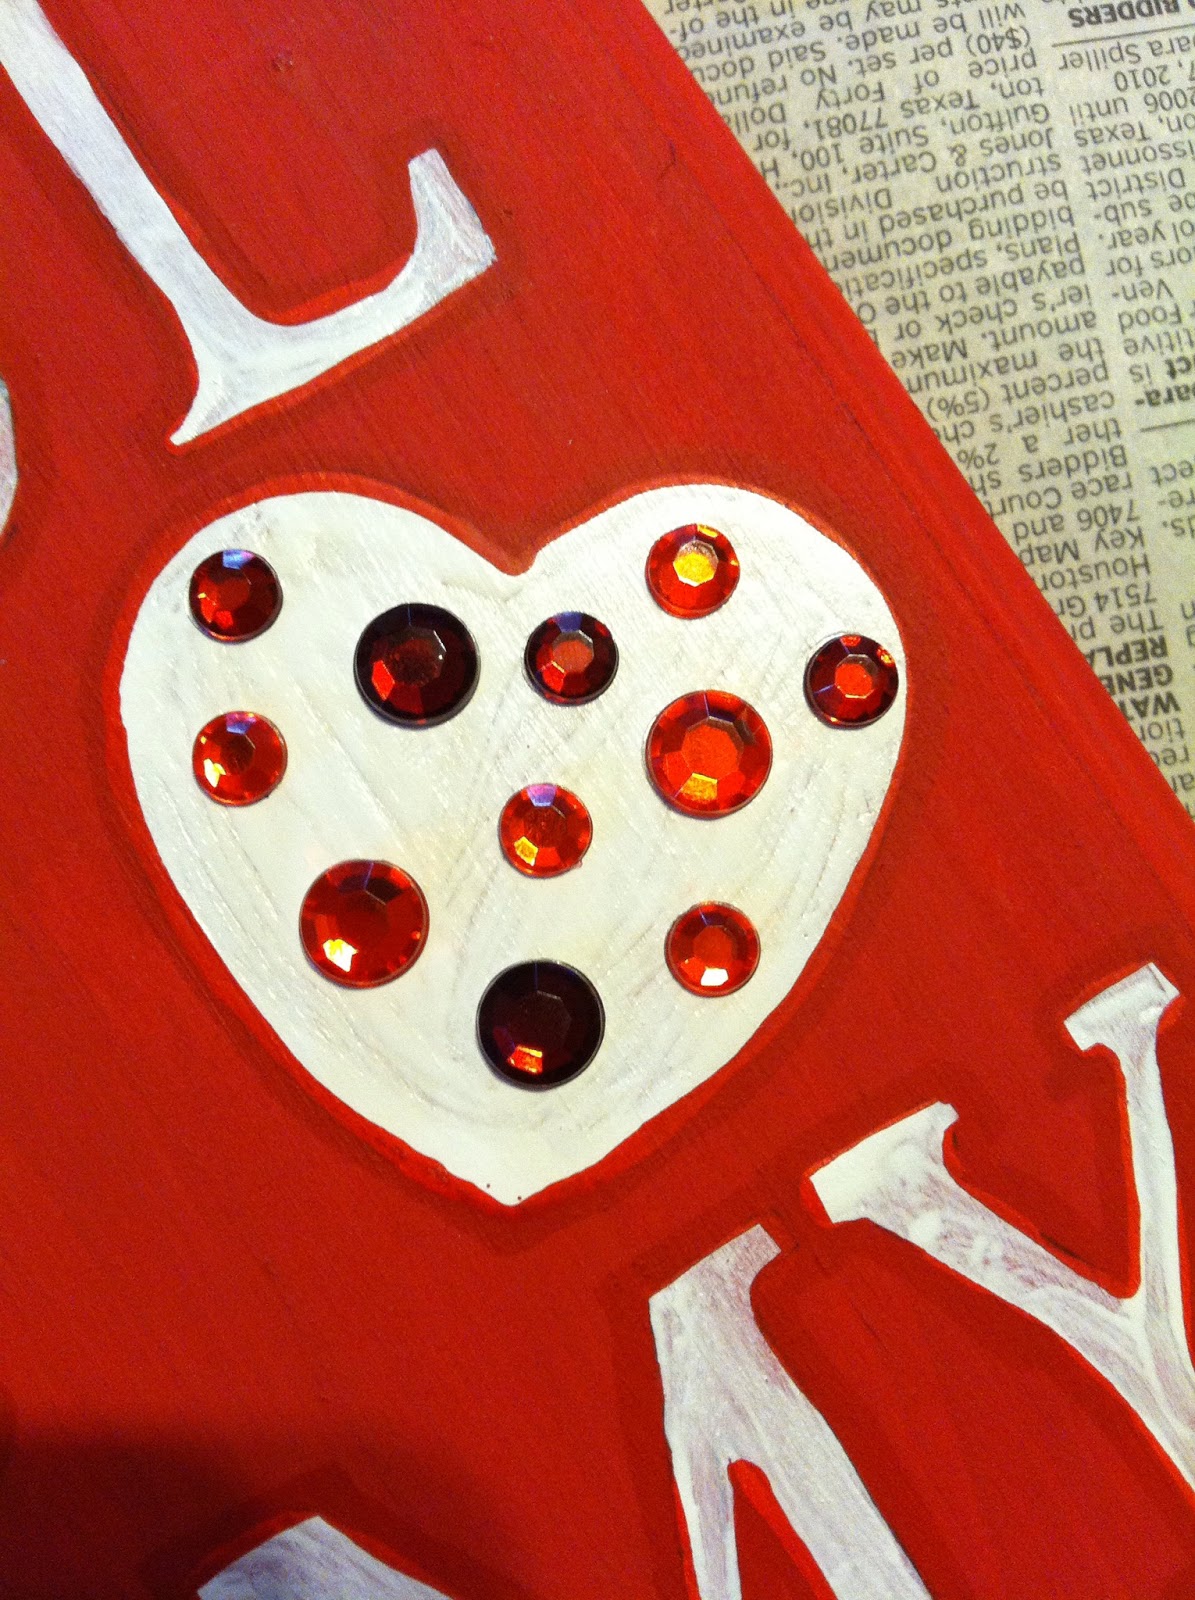
After that, I added a few little embellishments with the red rhinestones just to add a little flare to the sign. I thought it added a nice touch :)


Here is what your finished sign looks like:


You can hang this up on a wall or set it up on a fireplace mantle. Stay tuned for more crafts to help you decorate for Valentine's day! Once I have all of them, I will post a final picture of them all up!

Happy Crafting
& Enjoy!!
Tuesday, January 29, 2013

DIY Chevron Home Decor (Initial)


I LOVE CHEVRON!! Seriously, it's one of my favorite new patterns. Who is with me? Now I know it's Superbowl weekend and I should be giving you a ton of new recipes for your parties BUT I have been on this home decor kick lately and I just had to share. For tips on recipes to use for your Superbowl parties, check out our Recipes tab.

For anyone who has ever tried chevron, you know it can be difficult. Most people tell you to make grids and all this other kind of stuff. Who has the time or patience for that?! I definitely DO NOT. The good news is, the way I am teaching you is very simple and doesn't take very long. Hooray!

Just so you know, I did have a few hiccups along the way with this project. Good news is, I know exactly how to prevent those problems for next time, SO I assure you, you don't have to worry about them! :)

Supplies:
-Wooden Letter of your choosing (Mine was $13 from Hobby Lobby)***
-2 Spray paint colors of your choosing (I used green and white)
-Painter's Tape (I used 1 inch wide)
-An X-ACTO knife (or scissors if you don't have one)
Optional:
-High Gloss for finishing

***Tip: I am obsessed with my "new" last name so I love to put W's all over our house BUT this pattern can be done with anything that tape and paint will stick to, it doesn't have to be a wooden initial!

To start off, spray paint your letter (or whatever you are using) in the base coat. I used white as my base coat because I figured green would paint over white better than vice versa. I definitely recommend using your lighter color as the base.


TIP: I HIGHLY recommend using quality spray paint. For my base coat, I used the 96 cent spray paint from walmart and it peeled very badly. The quality spray paint is about $4 a can, but will not peel at all. I used the good paint for the green and it turned out WAY better. You'll see what I mean in the pictures below.

TIP: I painted my letter outside and had to pick some bugs off my paint that flew into it. Try to paint somewhere that doesn't have a bunch of critters!

Ok, back to the tutorial.

Next, let your base coat dry! I only let mine dry for about an hour which was not long enough... I couldn't help it, I just got  excited! If you don't let the paint dry, it will peel (see pictures below). If you can, let your letter dry over night!

Next, use your painter's tape to make diagonal lines across your letter. Space the tape lines about 1 inch apart, or the width of one piece of tape. You can measure this if you want to but I just eyeballed it and it turned out fine. When the tape went across lines on the letter, I just used one long piece of tape and then cut the tape out of the empty space.


Once you have finished the diagonal lines one way, do the same thing with diagonal lines the opposite way.


I think this looks pretty cool too, but right now we are going for a chevron look!

Now take an X-ACTO knife (or scissors if you don't have one) and cut out the pieces of tape that don't form the chevron pattern.


As you can see, this is where I encountered my peeling. Like I said earlier, use better quality spray paint and let your letter dry longer and this won't happen!

Now, go over your tape to make sure it's pressed down well and then spray your letter with your other color.

 
Finally, wait for your paint to dry, and peel off the tape! For those of you that didn't use cheap paint AND let your letter dry, this should be all you need to do.
 

As you can see, I had a little trouble with my white paint. The chevron pattern looks amazing, but I had to do something about those pesky little black spots.

To fix them, I just used some white acrylic paint I had and covered them up with a few coats. It worked very well! Here is a picture a few coats in, as you can see, we are almost there:

 
AND after a few more coats:
 

B-E-A-UTIFUL! Also, 10 points extra credit to anyone who got that movie reference.

Here are a few more pictures of my finished Chevron Letter. :) I am so in love with it!!


Happy Crafting
& Enjoy!!!
 
ALSO, special shout out to my mother in law, Vickie Walker, who is our newest follower!