I thought I'd share today about one of my newest Blog friends, Kala over at My Breezy Room. I "met" her (well virtually lol) during a giveaway on her page for an Urban Stamp Set that I won! It's very cool and I can't wait to use it for some awesome projects :) Kala has an online party going on now through the end of the Month with the company that the stamp set is through, Close to my Heart. Slip on over to her page and check it out, you wont be disappointed! Here is a picture of the stuff you can expect to see!
Thursday, March 28, 2013
Bloggy Friend: My Breezy Room
Hey Everyone,
I thought I'd share today about one of my newest Blog friends, Kala over at My Breezy Room. I "met" her (well virtually lol) during a giveaway on her page for an Urban Stamp Set that I won! It's very cool and I can't wait to use it for some awesome projects :) Kala has an online party going on now through the end of the Month with the company that the stamp set is through, Close to my Heart. Slip on over to her page and check it out, you wont be disappointed! Here is a picture of the stuff you can expect to see!
Monday, March 25, 2013
BLT Egg Salad
Hey everyone! Sorry it's been awhile since I posted. I have been busy with school and this weekend was my hubby's birthday so I didn't want to take away from his time. Everyone give him a birthday shout out in the comments below, he turned 27 on 3/24!
Today I have an easy recipe that can be used in a variety of settings. I made it one night when I was cooking dinner and we had it as a side dish but it could also be easily used as an afternoon snack or an appetizer at a party. The possibilities are endless! I adapted this recipe from this website, Mark's Daily Apple. :)
This dish is simple and quick! Not to mention it's a great thing to make after you get done dying your Easter eggs this weekend!
Ingredients:
-1 Avocado
-1 Tomato
-2 Hard boiled Eggs (Boil eggs for 10 min to hard boil)
-4-6 strips of Bacon ( I used turkey bacon, but regular bacon will work just as well!)
-Salt and pepper to taste
To start off, cook your bacon strips until they are at your desired crispy-ness. We like ours right in the middle of chewy and crispy which takes about 5 minutes with turkey bacon. Regular bacon will take a few minutes longer because it is thicker.
Next cut up you avocado, tomatoes, eggs, and bacon and mix it together. You can leave the yellow part of your egg in or take it out, it's up to you. I salt and peppered each layer as I went along but you can wait until the end if you would like.
Seriously, this recipe is that easy..... and it's good! The official taste tester doesn't even like tomatoes and he ate this stuff right up. There is something about the avocado goodness that is just irresistible I guess! Who loves avocados as much as I do? AND lets face, everything is better with bacon.
Here is a picture of your final product:
Don't let your drool get on your keyboard.
Happy Cooking everyone!!
Thursday, March 14, 2013
St. Patrick's Day Green Beer
With St. Patrick's Day coming up this weekend, I thought I'd share a lovely little "recipe" with you! Now, I'm not Irish, BUT I love a St. Patty's Day celebration as much as the next girl. I've always thought it was so cool how bars serve green beer, I just never knew how easy it is!
Ingredients:
3-5 drops of green food coloring
1 can or bottle of your favorite beer
As most beer is, this is ALWAYS better in a frosty mug so if you have a mug on hand, stick that sucker in the freezer!
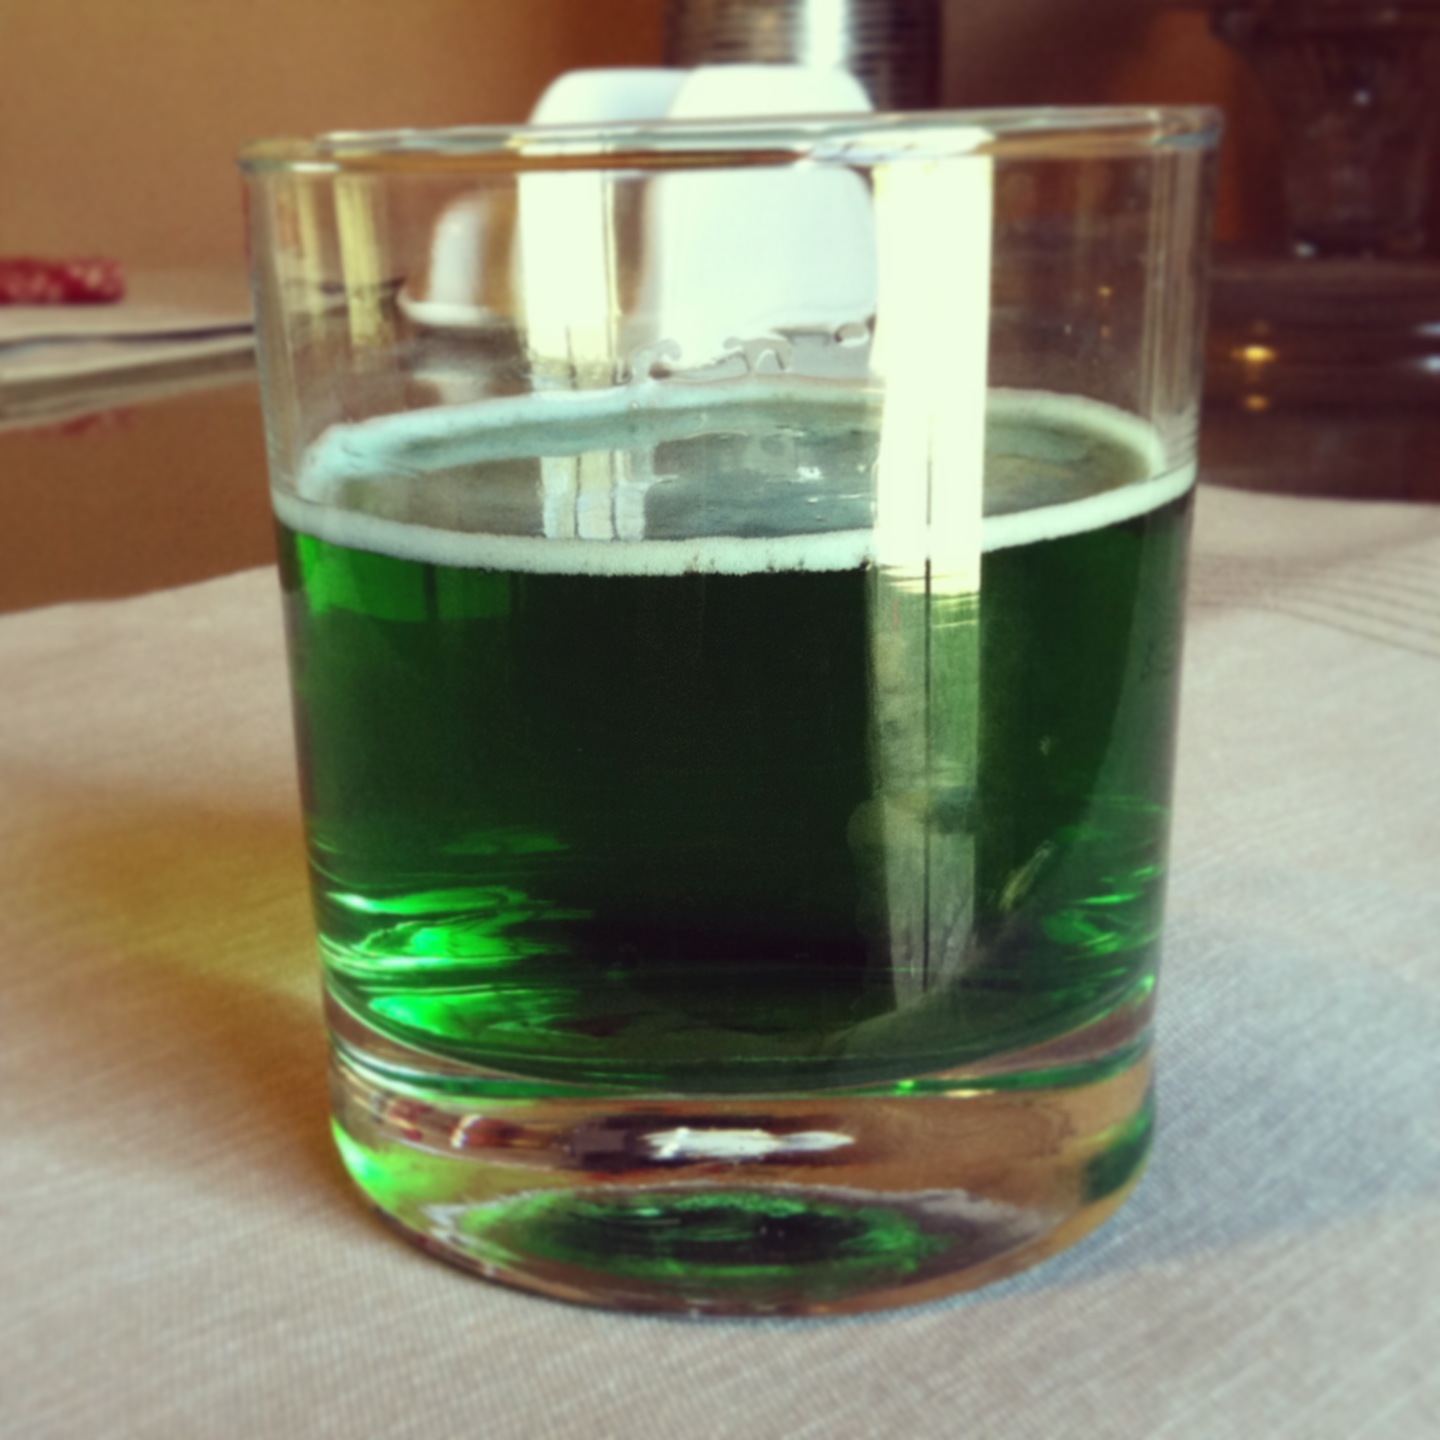
There is really only one trick to doing this: pour the food coloring in first. If you put the beer in first you will end up stirring your beer to mix in the food coloring... which will make it flat. Flat beer is
It doesn't matter if you use light or dark beer, you will just have to use more food coloring for darker beers. I used Leinenkugel's Lemon Berry Shandy since it's pretty much the best beer I have ever had. Seriously, you should try some ASAP. I think it's a Polish beer so if you want to be a little more authentic, you should probably use something Irish (but it's my fav!!!). I also did one with Miller Lite, they both looked the same.
Anyways, here is a picture of your final product.
I didn't have a real mug so I used the one I have from when I visited Harry Potter World at Universal Studios in Florida (hints, the ButterBeer logo). I felt VERY grown up drinking beer out of a Harry Potter cup. :)
These would be great to make at your St. Patty's Day party!
Have a safe and fun St. Patty's Day Celebration!!!
Wednesday, March 13, 2013
Follow us on Instagram
Hello All!
I have recently created an Instagram account for my blog to share even more photos and upcoming recipes with you. :) Please follow me! My username is @AllThingsWalker
Thursday, March 7, 2013
EASY DIY Home Decor
Today I'm going to share with you a project that is SO EASY. It's seriously 3 steps. I saw this on Pinterest at one time but I have no idea where the original pin came from. If you know, let me know so I can give credit!
Some things you know about me:
1. I love to monogram everything/ put my new initial everywhere
2. I love the color green (see my wedding)
3. I love projects that are easy
SO with those three things in mind, let me introduce you to the easiest project ever.
Supplies:
-Wooden Initial
-Wooden Frame
-Spray Paint
Remember how I said this project had three steps?
1. Buy your supplies
2. Paint your letter and frame
3. Hang it on your wall.
I guess technically you could say buying your supplies is multiple steps because I got my letter from Hobby Lobby and the frame from Micheals..... but thats just a technicaility.
You don't have to go get an expensive pretty frame. Almost anything looks good with a little spray paint on it. I think the frame I used was $2-3.
I didn't include any step by step instructions because I didn't think it was really necessary. Here are some pictures after the painting.
And the final product on my wall. Sorry the pictures are dark, I took them at night!
Isn't that cute?
Happy Crafting!!
Thursday, February 28, 2013
Red Velvet Ice Cream Cupcakes
Hey everyone! I'm SO excited to share this with you today! I feel like it has been awhile since I posted and this post is something I have been pretty excited about! It combines all my favorite things; red velvet cake, ice cream, whipped cream, cake, and sprinkles!!! I know what you're thinking... that is going to be WAY to sweet for me. It's actually not! This dessert is just the right amount of sweetness! AND, the best part is, you can store it in your freezer. They keep in your freezer for quite a while so you will pretty much always have some dessert on hand. :)
I got the idea for this recipe from Rachel at Bubbly Nature Creations. She has quite a few different varieties of ice cream cupcakes so I thought I'd try my hand at one. I must say, they turned out awesomely! I made two different varieties and used a special ingredient from Hobby Lobby. Don't worry, if you don't have a Hobby Lobby in your area, I have included directions on how to make it without this ingredient.
Ingredients:
-Devils Food Cake Mix*
-Ingredients to make cake (on back of box)
-Red Velvet Emulsion (Found at Hobby Lobby)*
-1 Gallon Vanilla or Vanilla Bean Ice Cream
-Homemade Whipped Cream Ingredients (Heavy Cream & Powdered Sugar)
-Sprinkles
Supplies:
-2 cupcake pans
-24 foil cupcake liners
*If you don't want to use the Red Velvet Emulsion, you can just buy Red Velvet Cake mix instead! I would definitely recommend the emulsion though, it makes everything so much more red velvety. :)
To start off, preheat your oven to 350. Mix your devils food cake mix (or red velvet) as directed on the box. Next, spoon about 1 Tbsp. of batter into 12 of your cupcake liners (1 cupcake pan). You are only trying to cover the bottom so don't put to much! Now stick these in the oven for about 15 minutes.
While those are cooking, add 2 Tbsp. Red Velvet Emulsion to the remaining cake mix (if you started with red velvet cake mix, skip this step) and stir it up. Now spoon about 1 Tbsp. of batter into your remaining cupcake liners. Once your first batch is done, stick the other cupcakes in the oven for about 15 minutes.
One both pans have cooked, set them aside to cool completely.
Once cooled, it time for the fun part....Ice cream! The ice cream needs to be somewhat soft so I would set it out for about 10-15 minutes before you work with it. To make the first version, take the pan of with the red velvet flavored cake and fill the cupcake liners the remaining way with ice cream (about 1 scoop). I used vanilla bean ice cream and it was AWESOME! :) Once filled, cover them and put them in the freezer to harden up.
Next take your remaining ice cream and mix in 2 Tbsp. red velvet emulsion. Seriously, this stuff is AWESOME, I had a few spoonfuls while I was filling my liners :) Once you make your red velvet ice cream, fill the chocolate cake liners up with ice cream just like you did before. Again, it will take about 1 scoop of ice cream per cupcake. Once your done, cover them and put them in the freezer to harden up.
While you are waiting, you can make the topping. For the cupcakes that had red velvet ice cream, I topped them with regular whipped cream. You can find the recipe for that here. For the cupcakes with vanilla ice cream, I added about 2 Tbsp. red velvet emulsion to the whipped cream recipe. Can I just say red velvet whipped cream and red velvet ice cream are my new two favorite things. :)
Once you have your whipped cream ready, top your cupcakes with it. You can do this using a Ziploc bag (see whipped cream tutorial) or of course you can use cake decorating supplies. Finally, top your lovely cupcakes with some sprinkles!
Here is a picture of your finished product, aren't they beautiful?
AND as good as they look, they taste even better!
Happy Cooking
& Enjoy!!
Thursday, February 21, 2013
Decorating Fail & Some Blog Wisdom
If any of you read my last post on Upcycling, you know I have been trying to decorate my house and make it look less BROWN. Well, my lesson for you today is, sometimes things just don't work out and you have to make the best of it/get over it.
This morning I came into our dinning room where I recently did some decorating and this is what I found:
Not the end of the world, but I also didn't really intend for our cat to use my place settings as a chair.
Anyways, the point of this whole post is; let things go. Problems come and go, but in the grand scheme of things, it probably isn't that big of deal (not that a cat on the table is a huge deal anyways, but it provided me with some enlightenment). While you may not have planned to have a cat on your place settings, it makes for a pretty cute picture after all. :)
This morning I came into our dinning room where I recently did some decorating and this is what I found:
Not the end of the world, but I also didn't really intend for our cat to use my place settings as a chair.
Anyways, the point of this whole post is; let things go. Problems come and go, but in the grand scheme of things, it probably isn't that big of deal (not that a cat on the table is a huge deal anyways, but it provided me with some enlightenment). While you may not have planned to have a cat on your place settings, it makes for a pretty cute picture after all. :)
Subscribe to:
Posts (Atom)