Wednesday, September 12, 2012

Key Lime Pie

Happy Wednesday! Since we have all made it beautifully through the week so far, lets all share this deliciously delectable piece of pie. :)

Ingredients:
1 cup Shortbread cookies (crushed)
1/2 cup Macadamia Nuts (finely chopped)
1/3 cup Butter, melted
1/4 cup Sugar
8 oz. Cream Cheese (softened)
1 can (14 oz.) sweetened condensed milk
1/2 cup key lime juice or lime juice

Optional Whipped Cream Garnish:
1 cup Whipping Cream
3 Tbsp. Powdered Sugar

Tip: I used my food chopper for both the cookies and the macadamia nuts. Since they both get combined together, you don't have to clean it out in between the two ingredients and it makes things 10x faster!

Tip: The key lime juice is right next to the lime juice in the grocery store and makes this pie taste so much better!

To start off, combine your crushed cookies, finely chopped macadamia nuts, butter, and sugar into a mixing bowl. Once this is mixed, pour it into your pie pan (9 inch) and press it evenly against all sides and the bottom. Refrigerate this for 30 minutes. Here is what my crust looked like:

 
Next, place your cream cheese in a mixing bowl and beat it with a mixer until smooth. If you forgot to take your cream cheese out of the fridge to soften (I do this often!), you can heat it in the microwave for about 15 seconds. Once your cream cheese is smooth, add in your condensed milk and key lime juice. Beat your mixture with a mixer until combined and then pour it into your pie crust. Refrigerate your pie for 4 hours. Here is what your pie should look like:
 

Optional: Whipped Cream Garnish
Directions for making your own whipped cream can be found in an earlier post here. I find that this really takes the pie to the next level, and it just looks awesome. Here is a picture of the final product:

 
Happy Cooking
& Enjoy!

 
Tuesday, September 11, 2012

Parmesan Crusted Tilapia


Sorry about not posting yesterday, I got busy and looked up and it was 10:30 p.m.! I hope you accept my apologies and enjoy this treat I have for you today.

I have to confess, I'm not much of a fish person. I really have to pump myself up to cook and eat it BUT this recipe is pretty good. I think I will be making it quite often! The good thing about it is, none of the ingredients have to be measured out exactly, so you can just use as little or as much as you want.

Ingredients (all are approx.):
3 Tilapia fillets (or however many you are cooking for)
2 Tbsp. butter
Garlic Powder
Parmesan
Parsley

To start off, preheat your oven to 400° and spray a pan with non-stick cooking spray. I used a 13x9, but the size really doesn't matter much, just as long as it's big enough to fit the fillets. Place one of your fillets onto a small plate. Melt your butter and then baste it on one side of your tilapia fillet. I have a basting brush that is really handy for this kind of thing, but if you don't have one you can use a spoon, it will get the job done! Once your tilapia is coated with some butter, sprinkle some garlic powder and parmesan on top. The amount you use is up to you, depending upon how much you like garlic and parmesan... I pretty much covered my fish in it (as you can see below! Place this side face down in your greased pan, and repeat the butter/garlic powder/parmesan combo on the remaining side. Repeat this with your remaining fillets and then sprinkle parsley on top of your fish. Here is what your fillets will look like before they go in the oven:

 
Bake your fillets for 10-12 minutes. Here is what the final product looks like:


They were awesome! I served them with mashed potatoes and asparagus (both coming in later posts) which just completed the meal.

Happy Cooking
& Enjoy!!!
 
 
Friday, September 7, 2012

Pigs in the Blanket


Hey Everyone! I hope you are as excited about the weekend as me! Here is a little recipe for your Saturday morning breakfast. These are great and easy!

Ingredients:
1 package little smokies (I usually get beef, but you can get whatever kind you want)
1 can crescent rolls
Tip: Sometimes, I get little smokies with cheese in them instead of beef!
 
Preheat your oven to 375°. Take your crescent roll and unroll it onto a cutting board. Cut it into 4 pieces. See my picture below for an example:

 
Take a little smokie, and wrap it in a piece of crescent roll. Some pieces may have more breading than others, but that's ok. Place each pig in the blanket on a cookie sheet. It's ok if they are close together because the breading won't expand that much. Here is a picture of mine as I went along:
 
 
Once you use all your ingredients, bake your pigs in the blanket for 11 minutes, or until golden brown. You may have a few little smokies or some crescent roll left, usually mine aren't an exact match. Here is a picture of the final product:
 
 
These are really good by themselves or dipped in mustard or honey. :)
 
Happy Cooking
& Enjoy!
Thursday, September 6, 2012

Spanish Rice

I hope everyone enjoyed day 1 of our two day Mexican food series! You can see the recipe for day 1 here. Today, as promised, we will be making Spanish rice. This stuff is easy to make and tastes awesome! Trust me, you will never buy those packages of rice again! This recipe is adapted from All Recipes.

Ingredients:
2 Tbsp. Olive oil
1/2 of an onion, diced (use the whole onion if you LOVE onions like me)
1 1/2 cups uncooked jasmine rice (**see tip below)
2 cups chicken broth
1 cup chunky salsa

TIP: You can really use white or brown or jasmine rice... I just ALWAYS use jasmine rice for everything because it tastes so much better. Seriously, if you have never tried it, you are missing out.

 
To start out, place your olive oil in a large pan (your rice will expand so make sure you have room for this!) and heat on medium. Add in your onions and saute until tender (they start to look slightly translucent). This should take about 5 minutes or so. Here is what mine looked like:
 
Before:

After:
 
Next, add your rice into the pan and saute it just like you did the onions. Do this until your rice starts to turn a slightly translucent whitish color and starts to brown some (the browning is very slight). Here is a picture of mine:
 
 
Next add in your chicken broth and your chunky salsa and stir together. Don't let the fact that there is a lot of liquid scare you, the rice will absorb it all. Here is what your rice should look like after you add the liquids:
 
 
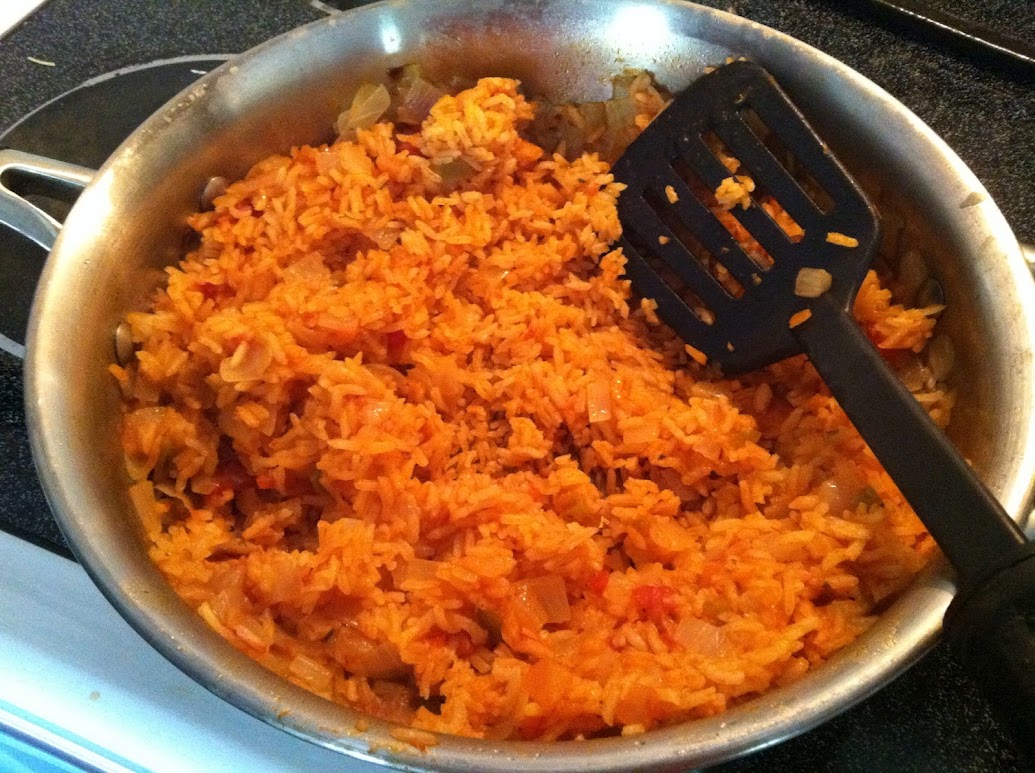
Turn your burner down to low, cover your pan (this is the most important step!) and let your rice simmer for 20-25 minutes. If you notice, this rice has the same cooking time as the enchiladas we made yesterday... they go together like pb & j! Once your rice is done simmering, stir it and try to contain yourself from eating it all at once... or don't! ;) Here is what your final product looks like:
 
 
Here is the rice paired with yesterday's enchiladas, refried beans, & guacamole.
 
 
Happy Cooking
& Enjoy!


Wednesday, September 5, 2012

White Chicken Enchiladas with Salsa Verde Sour Cream Sauce


I hope everyone is ready for two days of Mexican food! Today we will be featuring an EXCELLENT enchilada recipe and tomorrow we will be making Spanish rice. Grab your sombreros and lets get started!

This recipe is my go-to recipe when I'm having a large group of people over. It's easy to make for a lot of people or if you just want some leftovers for the next day. This makes 10 enchiladas which feeds anywhere from 5-10 people. If you need to make more just double the recipe. The original recipe can be viewed here, although, I have made some fairly significant revisions.

Ingredients:
2 boneless, skinless chicken breasts (shredded)
1 1/2 cups shredded Colby Jack cheese (really, any type of cheese would work)
10 flour tortillas (fajita size)
3 Tbsp. Butter
3 Tbsp. Flour
2 cups chicken broth
1 cup sour cream
1/2 cup Salsa Verde
2 cups shredded Monterrey Jack cheese

Tip: To make shredded chicken, boil your chicken breasts on medium-high heat for 15 minutes. Then take two forks and pull your chicken apart between them.

In a bowl, mix together your chicken and Colby Jack cheese. Next, take a tortilla and place about 1/4 cup chicken/cheese mixture onto your tortilla. This doesn't have to be exact by any means! Next, roll your tortilla up and place it into a 9x13 pan sprayed with non-stick cooking spray. Repeat this with the remaining tortillas. Ten tortillas should fit perfectly in your pan (see picture below) Here is a picture of the mixture on the tortilla so you can get an idea of how much I used (sorry it's blurry!).

 
Here is a picture of all my tortillas:
 
 
Next, set your tortilla pan aside and preheat your oven to 425°. While your oven is heating up you can make the sauce for your enchiladas.

In a medium to large sized pan, melt your butter and then whisk in your flour. Cook for 1 minute, stirring frequently. Add in your chicken broth, and whisk until smooth. Cook until the mixture becomes thick and starts to bubble, stirring occasionally. Here is what it should look like at this point:
 
 
Once your mixture is bubbling, add in your sour cream and Salsa Verde sauce, and whisk until smooth. Pour this mixture over your enchiladas and then sprinkle your Monterrey Jack cheese on top. Here is what you enchiladas will look like prior to being put in the oven:
 
 
Cook for 20-25 minutes. Here is what your final product will look like:
 
 
I hope you enjoy them! I paired mine with Spanish rice and refried beans in true Mexican style! Stay tuned tomorrow for the recipe on making Spanish rice from scratch!
 
 
Happy Cooking
& Enjoy!


Tuesday, September 4, 2012

Crockpot BBQ Ribs


I hope everyone had an awesome Labor Day weekend! To kick off your week, I thought I'd give you a simple crockpot recipe that the men (and women!) in your life will LOVE. I was first given this recipe by my sister, and now I make it quite often. This recipe is EASY, only has 2 ingredients, AND the ribs are so tender that they literally fall off the bone.

Ingredients:
1/2 rack of ribs (or however many you can fit in your crockpot)
Bottle of BBQ sauce

To make these ribs, place them in your crockpot, and pour the BBQ sauce over them. Cook them on low for 6-8 hours (depending upon the number of ribs you have) and then enjoy! Here is a picture of my finished product:


Happy Cooking
& Enjoy!
Monday, September 3, 2012

Labor Day

 
I hope everyone enjoys Labor Day! There will not be a post today in honor of this MUCH NEEDED holiday, but we will see you back tomorrow!

Take some time off my friends, you deserve it!