Title say whaaaaaaaaaaaaat? Soup with lamb and fruit?! Yes, you read correctly. Don't turn away just yet... let me convince you as to why you should read this and make this!
1. It's Hunger Games week and this is Katniss's favorite food
2. It's actually pretty good :)
3. I used Pork instead of Lamb
Come on everyone! Get in the spirit and make an authentic Hunger Games dish! It will make your viewing so much better :)
Day 3 of our week long Hunger Games series :) T minus 3 days & counting
until the release of the first Hunger Games DVD
Click here to see Day 1.
Click here and here to see Day 2.
Click here to see Day 4.
Click here to see Day 5.
Before we get started... I realize using pork is not as authentic as lamb BUT the town I live in does not have something that exotic in the grocery store AND lamb is expensive (like $30 a lb)!!!! The recipe is still awesome, believe me, the official taste tester was asking for seconds. It's exotic, creamy, and filling all at the same time! If you want to use lamb, you can see the original recipe here.
Ingredients:
2 - 2 1/2 lbs Pork Shoulder or Pork Loin, fat trimmed off
1/2 cup flour (this doesn't have to be exact)
3 Tbsp. Olive Oil
1 small onion, finely chopped
1/2 cup carrots, finely chopped
1 tsp. cinnamon
1/2 tsp. ground ginger
1/2 tsp. ground cumin
1/2 tsp. black pepper
1 tsp. salt
3 cups chicken stock
2 sweet potatoes, peeled and cut into cubes
1/2 cup dried plumbs, diced
1/4 cup dried apricots, diced
1/4 cup golden raisins
6 fresh mint leaves, diced (optional)
To start off, you are going to want to use a large stock pan or dutch oven that is both stove top and oven safe. This is the best method because you don't have to transfer between pans BUT if you don't have a pan that can be used for both, you can use separate pans and then transfer your stew.
Preheat your oven to 325°. Take your pork and cut it into small squares (mine were about an inch thick). Once your pork is cut up, grab a gallon size zip lock bag and throw your flour and pork into it. The amount of flour you use does not have to be exact, just use enough to coat your pork. Close your bag and shake it to coat your pork in flour. Throw the excess flour away.
Next, heat your olive oil in your pan on medium heat. Once heated, drop your pork in a single layer into the olive oil and brown for about 1 minute on each side. You will have to do this in batches because your pork won't fit in at one time. Also, the more batches you do, the thicker your oil will get (from the flour). If needed, add more oil. At one point, my oil was so thick that I just dumped it out and started with fresh oil which is also ok. Here is a picture of what your pork will look like after browning:
After all your pork is browned, remove it from the pan and set it aside. Toss your carrots and onions into your pan and cook for 3-5 minutes or until tender. To save time (and because I'm lazy), I used my food chopper to cut up my carrots and onions but you can do them by hand if you don't have one. Once your carrots and onions are cooked, the onions should have an orange tint to them from the carrots. Here is a picture of mine:
Once your carrots and onions are ready, add in your cinnamon, ginger, cumin, black pepper, and salt and then stir to coat. Add your pork back in and stir it up again, and then add in your chicken stock and stir it up again. Turn your stew down to medium-low and bring it to a simmer. Then, place your stew (covered) on the middle oven rack and cook for 1.5 hours. If you don't have a cover for your pan, you can use a piece of foil.
I took this hour and a half to clean up from the first round of the stew and cut up my sweet potatoes and dried fruits (and watch a little TV!). I was lazy again with the dried fruits so I put them in the chopper. You can't really do that with sweet potatoes so I had to do it by hand. Try and make sure your sweet potato cubes are about the same size so that they will cook evenly. My cubes were about 1/2 inch on all sides, but you can make yours smaller if you want. Here is a picture of what my dried fruits look like, chopped and ready to go:
Once your stew has finished cooking, add in your sweet potatoes, dried plums, dried apricots, and raisins and return the stew to the oven. If your sauce is thicker than you would like, add a little water into your stew. I added in about 1/2 a cup of water to mine. Cook for 25 more minutes. Once your stew is done, remove it from the oven and add in your mint.
I served my stew over hot buttered noodles and I think that really set off the dish. To do this, just boil some noodles of your choosing, drain them and coat in some butter. Here is a picture of the dish over noodles:
Happy cooking and may the odds be ever in your favor!
Wednesday, August 15, 2012
Tuesday, August 14, 2012
District 13 Bread (Biscuits)
Day 2 of our week long Hunger Games series :) T minus 4 days & counting
until the release of the first Hunger Games DVD
Click here to see Day 1.
Click here to see Day 3.
Click here to see Day 4.
Click here to see Day 5.
What is something that all the districts have but that is also unique to each district?
-10 reaping slips to you if you guessed bread. This recipe is pretty great considering most things in District 13 are pretty bland. If you did not know there was a District 13, go read books 2 & 3! You can see the original post here. There is also a pretty awesome cinnamon butter spread to go along with it that you can find here.
Ingredients:
3 cups flour (I used half wheat flour & half all purpose white flour, but you can use any combo)
1 1/2 tsp. salt
1 Tbsp. sugar
1 1/2 tsp. baking powder
1 stick butter (room temperature)
3/4 cup buttermilk
1 egg
1/4 cup water
Preheat your oven to 425°. Mix your flour, salt, sugar, & baking powder together until incorporated. Add in your butter and mix until crumbly (I used a hand mixer for this). If you forget to let your butter get to room temperature, you can zap it in the microwave for 15 seconds. Next, mix in your buttermilk, egg, and water with a spoon until just incorporated. Do not use the hand mixer for this or over mix with your spoon because it will make your dough flat. I used my hands to mix this up all the way.
By this time you should have a nice little ball of dough. Place your dough ball onto a floured cutting board and roll it out with a rolling pin to about 1 inch thickness! It's important to not make your dough too thin because your biscuits will not rise very much in the oven. Keeping them thick ensures they are soft and fluffy. Here is a picture of my dough rolled out:
Once you roll your dough out, find something to cut it into circles that is about 2 inches in diameter. I used a cup. You will have extra dough left over after you cut out your circles but you can just smash it back together, roll it out again, and cut out more biscuits. Repeat until you are out of dough. Place your biscuit circles, touching each other, onto a greased cookie sheet. Here is what mine looked like right before I tossed them in the oven (the one in the top right corner was the last bit of left over dough that I molded into it's own biscuit):
Cook for 12-18 minutes. Yes, I know, that's a very large range, but how fast bread cooks is completely dependent upon your oven (how slow or fast it cooks). I set mine for 12 minutes and then checked them and added 2 minutes at a time until they were golden brown on top. It ended up being 18 minutes total. Here is the finished product:
This recipe makes about 10 biscuits depending upon how thick you make them.
Happy cooking & may the odds be ever in your favor!
Click here to see Day 1.
Click here to see Day 3.
Click here to see Day 4.
Click here to see Day 5.
What is something that all the districts have but that is also unique to each district?
-10 reaping slips to you if you guessed bread. This recipe is pretty great considering most things in District 13 are pretty bland. If you did not know there was a District 13, go read books 2 & 3! You can see the original post here. There is also a pretty awesome cinnamon butter spread to go along with it that you can find here.
Ingredients:
3 cups flour (I used half wheat flour & half all purpose white flour, but you can use any combo)
1 1/2 tsp. salt
1 Tbsp. sugar
1 1/2 tsp. baking powder
1 stick butter (room temperature)
3/4 cup buttermilk
1 egg
1/4 cup water
Preheat your oven to 425°. Mix your flour, salt, sugar, & baking powder together until incorporated. Add in your butter and mix until crumbly (I used a hand mixer for this). If you forget to let your butter get to room temperature, you can zap it in the microwave for 15 seconds. Next, mix in your buttermilk, egg, and water with a spoon until just incorporated. Do not use the hand mixer for this or over mix with your spoon because it will make your dough flat. I used my hands to mix this up all the way.
By this time you should have a nice little ball of dough. Place your dough ball onto a floured cutting board and roll it out with a rolling pin to about 1 inch thickness! It's important to not make your dough too thin because your biscuits will not rise very much in the oven. Keeping them thick ensures they are soft and fluffy. Here is a picture of my dough rolled out:
Once you roll your dough out, find something to cut it into circles that is about 2 inches in diameter. I used a cup. You will have extra dough left over after you cut out your circles but you can just smash it back together, roll it out again, and cut out more biscuits. Repeat until you are out of dough. Place your biscuit circles, touching each other, onto a greased cookie sheet. Here is what mine looked like right before I tossed them in the oven (the one in the top right corner was the last bit of left over dough that I molded into it's own biscuit):
Happy cooking & may the odds be ever in your favor!
Cinnamon Butter
This stuff is awesome and goes perfectly with our District 13 Bread (biscuits). Check it out!
Ingredients:
1 stick of butter (room temp)
1/4 cup honey
1/4 cup powdered sugar
1 tsp. cinnamon
Place your room temperature butter in a bowl and beat with a hand mixer for 30 seconds. If you don't have a hand mixer you can use a whisk for 1-2 minutes.
**TIP: If you forget to set out your butter and it's still cold you can heat it in the microwave for 15 seconds.
Next, add in your honey, powdered sugar, and cinnamon. Beat with hand mixer for 2 minutes or until butter becomes fluffy (If you use a whisk this will take about 4 minutes). That's it! Pretty easy huh? This keeps excellently in the fridge for a month or two and is great on pretty much everything!
Here is a picture of what your final product will look like:
Ingredients:
1 stick of butter (room temp)
1/4 cup honey
1/4 cup powdered sugar
1 tsp. cinnamon
Place your room temperature butter in a bowl and beat with a hand mixer for 30 seconds. If you don't have a hand mixer you can use a whisk for 1-2 minutes.
**TIP: If you forget to set out your butter and it's still cold you can heat it in the microwave for 15 seconds.
Next, add in your honey, powdered sugar, and cinnamon. Beat with hand mixer for 2 minutes or until butter becomes fluffy (If you use a whisk this will take about 4 minutes). That's it! Pretty easy huh? This keeps excellently in the fridge for a month or two and is great on pretty much everything!
Here is a picture of what your final product will look like:
Happy cooking & may the odds be ever in your favor!
Monday, August 13, 2012
Capital Hot Chocolate
Day 1 of our week long Hunger Games series :) T minus 5 days & counting until the release of the first Hunger Games DVD
Click here and here to see Day 2.
Click here to see Day 3.
Click here to see Day 4.
Click here to see Day 5.
OK guys, I know its August and a million degrees outside BUT hot chocolate is the perfect thing to start off our Hunger Games week! After all, Katniss tried it for the first time when she went to the capital AND if Katniss can volunteer as tribute for her sister, we can drink a little hot chocolate when its hot outside. Besides, once you taste this homemade chocolaty goodness you will never go back to that nasty powdered hot chocolate ever again! This recipe is a slight variation from the Hersey's hot chocolate recipe.
This can be made in a family size version or a single serve version. I'll give you recipes for both. :)
Ingredients (makes 6 servings):
1/4 cup Hersey's Cocoa
1/2 cup sugar
Dash of salt
1/3 cup HOT water
4 cups milk
3/4 tsp vanilla extract
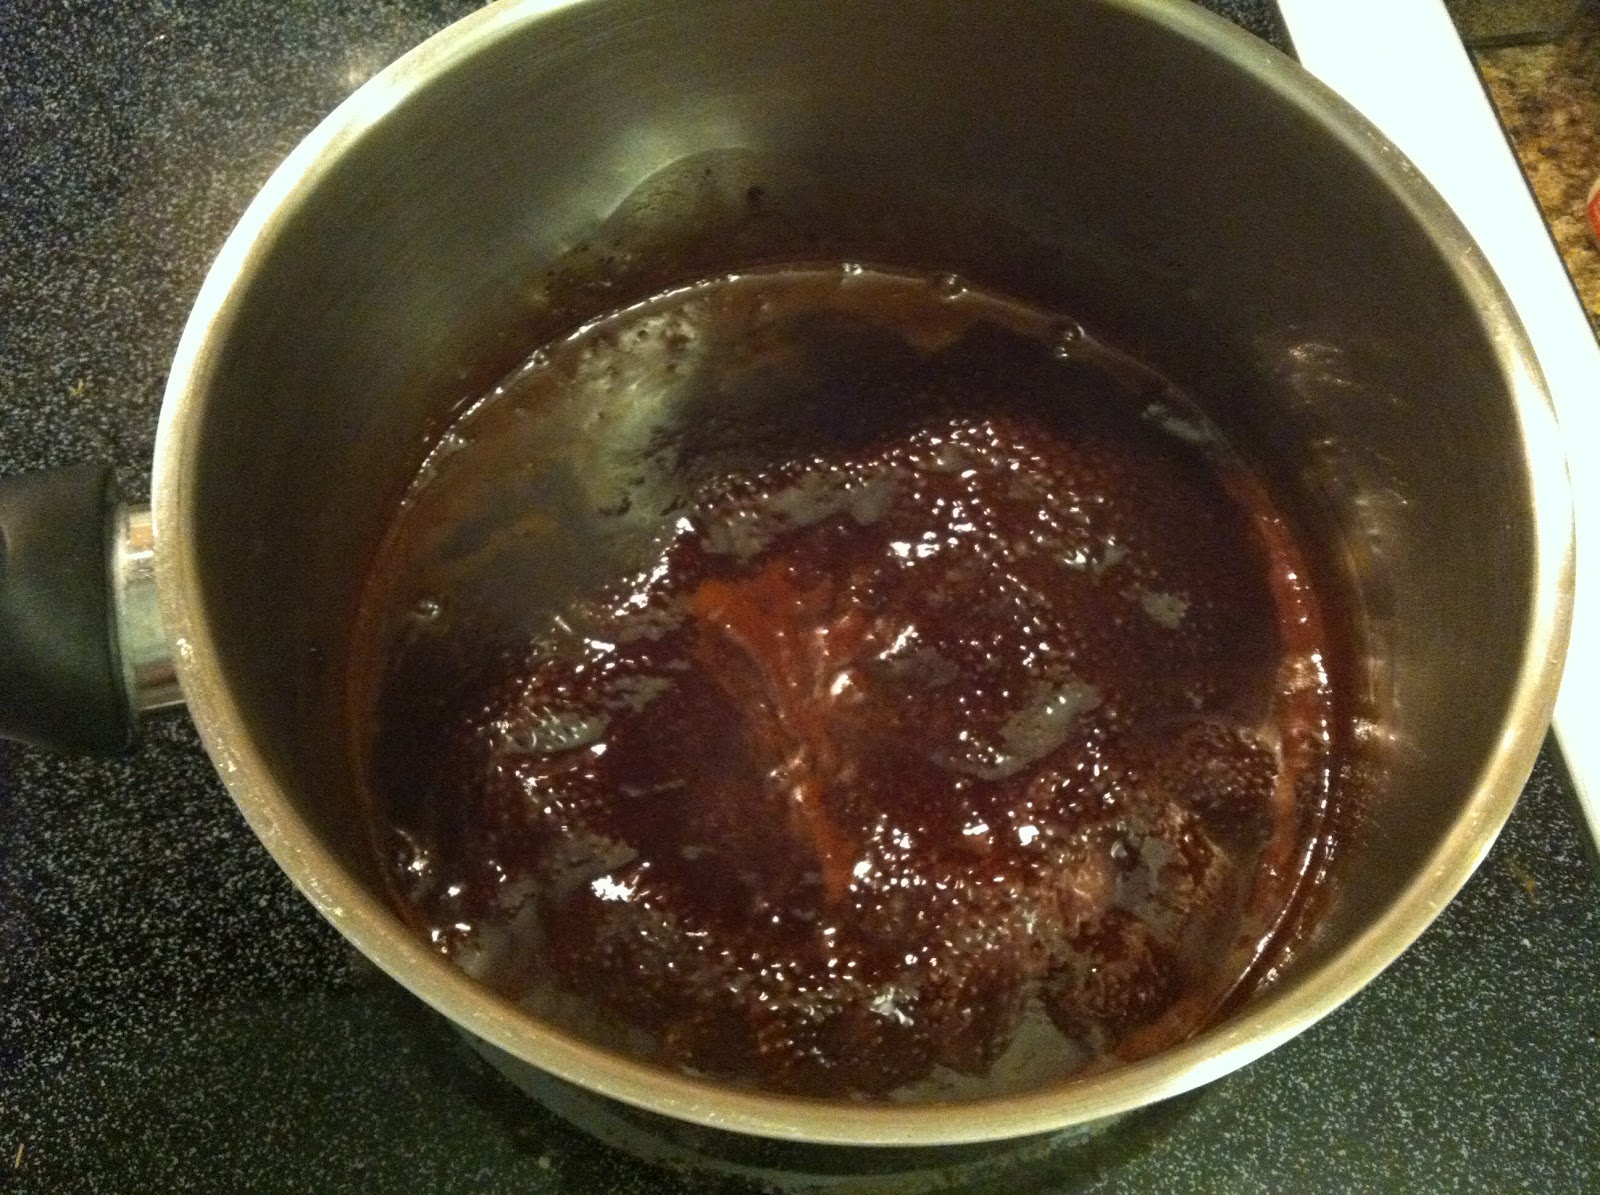
To start off, mix you cocoa, sugar and salt together in a sauce pan (make sure it's big enough to accommodate the rest of your ingredients!). Stir in your water and heat on medium heat until the mixture boils. DO NOT crank up your heat to try and get this step done faster, it will burn your sugar! Once the mixture is boiling, heat it for an additional 2 minutes while stirring it often. It should look something like this while boiling:
Next, stir in your milk. Continue to heat and stir occasionally until hot BUT DO NOT boil your mixture once you add the milk. To know if you milk is hot you can hold your hand about half an inch over the mixture. If you can feel the heat coming off, its hot. You can also tell by looking at it. There should be a white foam on top when it gets hot that looks like this:
Once your cocoa mixture is hot, remove from heat and add in the vanilla. The vanilla is what makes this recipe SOOOOOOO good. Finally, pour hot cocoa into individual cups and enjoy! You won't regret your choice to indulge in one of the capital's signature drinks!
Single serve directions in the microwave:
Ingredients:
2 Tbsp Sugar
2 Tbsp Hersey's Cocoa
Dash of salt
1 cup milk
1/4 tsp. vanilla extract
Mix sugar, cocoa and salt in a large mug. Add in your milk and stir (your mixture will be very lumpy but stir it up as much as possible. Heat your mixture in the microwave on HIGH for 1 - 1 1/2 minutes (or until hot). Remove from microwave and stir in vanilla.
Happy cooking and may the odds be ever in your favor!
What Hunger Games recipes would you most like to see? What are you most looking forward to about the movie? Let us know in the comments section below!
Click here and here to see Day 2.
Click here to see Day 3.
Click here to see Day 4.
Click here to see Day 5.
OK guys, I know its August and a million degrees outside BUT hot chocolate is the perfect thing to start off our Hunger Games week! After all, Katniss tried it for the first time when she went to the capital AND if Katniss can volunteer as tribute for her sister, we can drink a little hot chocolate when its hot outside. Besides, once you taste this homemade chocolaty goodness you will never go back to that nasty powdered hot chocolate ever again! This recipe is a slight variation from the Hersey's hot chocolate recipe.
This can be made in a family size version or a single serve version. I'll give you recipes for both. :)
Ingredients (makes 6 servings):
1/4 cup Hersey's Cocoa
1/2 cup sugar
Dash of salt
1/3 cup HOT water
4 cups milk
3/4 tsp vanilla extract
To start off, mix you cocoa, sugar and salt together in a sauce pan (make sure it's big enough to accommodate the rest of your ingredients!). Stir in your water and heat on medium heat until the mixture boils. DO NOT crank up your heat to try and get this step done faster, it will burn your sugar! Once the mixture is boiling, heat it for an additional 2 minutes while stirring it often. It should look something like this while boiling:
Next, stir in your milk. Continue to heat and stir occasionally until hot BUT DO NOT boil your mixture once you add the milk. To know if you milk is hot you can hold your hand about half an inch over the mixture. If you can feel the heat coming off, its hot. You can also tell by looking at it. There should be a white foam on top when it gets hot that looks like this:
Once your cocoa mixture is hot, remove from heat and add in the vanilla. The vanilla is what makes this recipe SOOOOOOO good. Finally, pour hot cocoa into individual cups and enjoy! You won't regret your choice to indulge in one of the capital's signature drinks!
Single serve directions in the microwave:
Ingredients:
2 Tbsp Sugar
2 Tbsp Hersey's Cocoa
Dash of salt
1 cup milk
1/4 tsp. vanilla extract
Mix sugar, cocoa and salt in a large mug. Add in your milk and stir (your mixture will be very lumpy but stir it up as much as possible. Heat your mixture in the microwave on HIGH for 1 - 1 1/2 minutes (or until hot). Remove from microwave and stir in vanilla.
Happy cooking and may the odds be ever in your favor!
What Hunger Games recipes would you most like to see? What are you most looking forward to about the movie? Let us know in the comments section below!
Friday, August 10, 2012
Laundry Room Decoration
There are some perpetual problems with living in a rent house...You can't get away from the fact that you aren't allowed to paint the walls or make any type of nail holes in the wall. These problems make decorating a rent house very difficult.
With that being said, I have this empty space above my washer & dryer. It's really sad looking and it overlooks my kitchen (which as you know, I spend alot of time in). I have been looking for an inexpensive way to decorate it that overcomes the two problems I listed above and I think I have found the solution!
I went to Hobby Lobby and found these wood letters:
There was quite a bit of space (length wise) so I wanted letters that were pretty big. These letters cost $3.50 a piece (yikes!), but they have smaller letters for cheaper. They also have cardboard letters that are even cheaper. I found a blog a while back using cardboard letters, but I currently can't locate it. If you know where it is, leave it in the comments below!
If anyone is wondering, I'm using the letters to spell "wash". I wanted to spell out laundry but I didn't have the room (or the money!), so I had to improvise.
Next, you need to pick out the color of spray paint you want to use. Hobby Lobby sells spray paint, but at $8 a can, its to expensive for me! I got mine from Wal-Mart for $3.50. One can should be more than enough.
To start painting, place your letter in a well-ventilated area that you don't mind getting a little paint on. I used green to paint mine so I just did it outside on the grass. If you are using a different color and don't want to spray paint your lawn you can put some newspaper under your letters. Make sure you shake your spray paint can for about a minute before you get started and then start spraying your letters at a distance of about 6 inches or so. The amount of coats your letters will need depends upon the type of spray paint you buy and if you prime your wood. I didn't feel like priming my wood and mine needed about 3 coats.
Here is what they look like drying in the sun:
This project took about 15 minutes (not counting drying time) and looks great! To spice it up a little more, I'm probably going to add a small shelf as well :) That will also hide those ugly washer connections!
Note: Daniel did not really get the point of this decoration. I think he thought I was trying to give him some type of instructions with it lol so you may want to forewarn your significant other.
I LOVE TO HEAR FROM YOU! Please leave comments/questions below!
With that being said, I have this empty space above my washer & dryer. It's really sad looking and it overlooks my kitchen (which as you know, I spend alot of time in). I have been looking for an inexpensive way to decorate it that overcomes the two problems I listed above and I think I have found the solution!
I went to Hobby Lobby and found these wood letters:
There was quite a bit of space (length wise) so I wanted letters that were pretty big. These letters cost $3.50 a piece (yikes!), but they have smaller letters for cheaper. They also have cardboard letters that are even cheaper. I found a blog a while back using cardboard letters, but I currently can't locate it. If you know where it is, leave it in the comments below!
If anyone is wondering, I'm using the letters to spell "wash". I wanted to spell out laundry but I didn't have the room (or the money!), so I had to improvise.
Next, you need to pick out the color of spray paint you want to use. Hobby Lobby sells spray paint, but at $8 a can, its to expensive for me! I got mine from Wal-Mart for $3.50. One can should be more than enough.
To start painting, place your letter in a well-ventilated area that you don't mind getting a little paint on. I used green to paint mine so I just did it outside on the grass. If you are using a different color and don't want to spray paint your lawn you can put some newspaper under your letters. Make sure you shake your spray paint can for about a minute before you get started and then start spraying your letters at a distance of about 6 inches or so. The amount of coats your letters will need depends upon the type of spray paint you buy and if you prime your wood. I didn't feel like priming my wood and mine needed about 3 coats.
Here is what they look like drying in the sun:
Note: Be careful when painting outside, a bug committed suicide on my S which smudged my paint. Nothing another coat can't fix though!
The colors are a little bit different in every picture because the change in lighting.
Here is a picture once they fully dried:
So, now we have tackled the painting issue of rent house but we still have the no nail holes problem. The simple solution to this is using command strips. I pretty much use these to hang everything in my house. As far as hanging the letters up, you can measure a line out if you want everything to be perfectly strait. I'm to lazy for that so I just eyeballed it.
Here is the finished product:
Note: Daniel did not really get the point of this decoration. I think he thought I was trying to give him some type of instructions with it lol so you may want to forewarn your significant other.
I LOVE TO HEAR FROM YOU! Please leave comments/questions below!
Thursday, August 9, 2012
Baked Ziti
I have a very special reader that is a vegetarian :) I noticed that so far my blog has not been very vegetarian friendly SO I decided to post this. It still tastes really good for all those who do not embrace the veggie lifestyle, so don't turn away just yet. This dish is also a staple in our kitchen because I frequently forget to lay out the meat for dinner in the mornings. There is nothing worse then getting home from a long days work and everything you need to cook dinner is frozen solid. This recipe solves that problem, is easy to make, and is excellent leftover the next day (or few days!).
Ingredients:
16 oz. Pasta (technically you are supposed to use ziti noodles but who really cares?)
45 oz. Pasta/Spaghetti sauce (any flavor you want)
2-2/12 cups Mozzarella cheese
optional: Parmesan cheese
To start off, boil your pasta according to package directions. Once that is done, drain the water off the pasta and stir in the pasta sauce. In a future post, I will show you how to make your pasta sauce from scratch but for times sake, we will use store bought. Grab a 13x9 pan and spray it with non-stick cooking spray. Now comes the tricky part (I hope you caught my sarcasm)! Make layers of your pasta mixture and cheese. This isn't an exact science and there is really no right way to do this. In fact, it's literally impossible to mess this part up. Use as much or as little cheese as you want. Also, if you are deciding to add in the Parmesan cheese, you can add that into your layers as well. Once you have used all your pasta, make your top layer cheese.
Here is a picture of what it looks like before you stick it in the oven:
Bake at 350° for 20 minutes. This dish goes nicely with a side salad and garlic bread.
Here is the finished product:
The "official taste tester", as he calls himself, approves :)
Ingredients:
16 oz. Pasta (technically you are supposed to use ziti noodles but who really cares?)
45 oz. Pasta/Spaghetti sauce (any flavor you want)
2-2/12 cups Mozzarella cheese
optional: Parmesan cheese
To start off, boil your pasta according to package directions. Once that is done, drain the water off the pasta and stir in the pasta sauce. In a future post, I will show you how to make your pasta sauce from scratch but for times sake, we will use store bought. Grab a 13x9 pan and spray it with non-stick cooking spray. Now comes the tricky part (I hope you caught my sarcasm)! Make layers of your pasta mixture and cheese. This isn't an exact science and there is really no right way to do this. In fact, it's literally impossible to mess this part up. Use as much or as little cheese as you want. Also, if you are deciding to add in the Parmesan cheese, you can add that into your layers as well. Once you have used all your pasta, make your top layer cheese.
Here is a picture of what it looks like before you stick it in the oven:
Bake at 350° for 20 minutes. This dish goes nicely with a side salad and garlic bread.
Here is the finished product:
The "official taste tester", as he calls himself, approves :)
Wednesday, August 8, 2012
Homemade Whipped Cream
Who loves whipped cream? This girl right here! Who does not enjoy pre-made and processed foods when making it from scratch takes about 2 minutes? ME ME ME! So if you can guess, I DO NOT like buying whipped cream. Its expensive, it's REALLY easy to make yourself, and the real thing tastes SO MUCH BETTER! I thought I'd share this recipe (if you could even call it that) because whipped cream can be used to decorate pretty much any dessert. Not only is it good, but it makes the dish look "pretty" and part of impressing is in the presentation.
Ingredients:
-1 cup whipping cream
-2-3 Tablespoons powdered sugar
Pour your cup of whipping cream into a bowl (make sure you use a bowl with some extra room because the whipping cream will double in size) and beat on medium speed until soft peaks form. What is a soft peak you may ask? This is when you insert the beater (when its off!) into the whipping cream and the cream forms a peak when you pull it out (normally, the cream would drip right off the beater). A soft peak will fall right back over into its side while a stiff peak will continue standing strait up. Save that stiff peak knowledge for later because you will need it! Once your whipping cream forms soft peaks, add your 2-3 tablespoons powdered sugar. I ALWAYS use 3 tablespoons because I like my whipped cream sweet but add powdered sugar to your liking. Finally, beat your cream on medium speed until stiff peaks form (remember that stiff peak knowledge!). This should happen relatively quickly.
Here is what your whipped cream will look like when it's finished:
One thing to remember, whipped cream will melt if it gets hot. The heat from your hands is not the whipped cream's friend, so try to do the decorating as quickly as possible. Also, any cake that has whipped cream on it needs to be refrigerated.
Ingredients:
-1 cup whipping cream
-2-3 Tablespoons powdered sugar
Pour your cup of whipping cream into a bowl (make sure you use a bowl with some extra room because the whipping cream will double in size) and beat on medium speed until soft peaks form. What is a soft peak you may ask? This is when you insert the beater (when its off!) into the whipping cream and the cream forms a peak when you pull it out (normally, the cream would drip right off the beater). A soft peak will fall right back over into its side while a stiff peak will continue standing strait up. Save that stiff peak knowledge for later because you will need it! Once your whipping cream forms soft peaks, add your 2-3 tablespoons powdered sugar. I ALWAYS use 3 tablespoons because I like my whipped cream sweet but add powdered sugar to your liking. Finally, beat your cream on medium speed until stiff peaks form (remember that stiff peak knowledge!). This should happen relatively quickly.
Here is what your whipped cream will look like when it's finished:
Who could resist that fluffy goodness? I certainly couldn't. If you want to make it chocolate flavored, add a little cocoa powder. Same goes for any type of flavoring you can buy (vanilla, almond, etc.).
If you just want to put a little dollop on a piece of pie or some ice cream, stop here and go to town! I almost exclusively use whipped cream to decorate my cakes so keep reading to find out how to do that.
Grab a large cup and a gallon zip lock bag. Place the zip lock bag into the cup and then fold the edges over to create a pouch. Spoon your whipped cream into the bag. It should look something like this:
There is absolutely no reason to buy piping bags. They are robbery EXPENSIVE and you can get just as good of an effect with a zip lock bag. Cut the corner off of your ziplock and start decorating. The size of your cut will determine the size of your whipped cream decoration so be careful here. I don't have any type of fancy cake decorating skills, so I usually just cut a small hole and then do uneven circles around the outside edge of the cake(see picture below). Sometimes, if my design isn't really turning out, I just pipe the rest of the whipped cream onto my cake and then take a whisk and play with the whipped cream until it all looks uniform. You really can't mess this step up.
One thing to remember, whipped cream will melt if it gets hot. The heat from your hands is not the whipped cream's friend, so try to do the decorating as quickly as possible. Also, any cake that has whipped cream on it needs to be refrigerated.
Here is a picture of a cake decorated with the whipped cream:
SO EASY and this cake definitely looks store bought. Enjoy!
Subscribe to:
Posts (Atom)