

Hey guys! Today I have a post for you that I have been very excited to share! I made this for my mom for Mother's Day so I have been sitting on this post for a while with my lips sealed shut! This craft is really easy to make and is so cute!
Supplies:
-Cute craft paper OR a color printer
-Microsoft Word (or Paint)
-Scissors
-Clear iPhone case
-Optional: Exacto Knife
-Optional: Laminator or sealing paper
Ok, to start off, I would buy your iPhone case. There isn't really a point in doing the other parts if you can't get the case to protect your phone. I got mine at Wal-Mart for about $18 (I think it was the Skin it brand). After I bought it, I saw that Wal-Mart had a generic brand in their photo section for $14.... DANG!!! You can also get them on Amazon here if you are patient enough to wait on the shipping for about $2... DOUBLE DANG!! Here is a picture of the one I got:

Once you have your case, the rest of it is pretty easy!
At first, I just was printing black letters and designs out of Microsoft Word onto colored scrapbook paper. These looked OK, but I thought I could do a lot better.
Next, I tried just making different colored designs in Microsoft Word and then printing them on a color printer. This worked perfectly! Really, you can use any designs you want, but I will post mine if you just want to use those. I also added some personalization to mine to make them special for my mom. :) She seemed to really like them!
Once you print out your designs, cut them out in the shape of your iPhone. To make this easier, I got a clear hard piece of plastic and made a stencil/pattern to use when cutting out my designs, it made things MUCH easier. Here is a picture of my stencil and some of the covers:


Also, the part where your camera is on the case is hard to cut out with regular scissors. I eventually got an exacto knife and it worked SO MUCH better and was a lot easier. I would definitely recommend it.
Once you are done cutting out your designs, you can laminate them for a little extra protection. If you don't have a laminator, Wal-Mart sells at home laminating paper. Basically you just stick whatever you want to laminate between two pieces of clear plastic that are sticky on the inside and then just cut off the excess.
Once you have everything finished, just stick your designed cover inside your case and pop your iPhone in. My sister got my mom a wallet and it went perfectly with one of the cases I made. Here are some pictures!


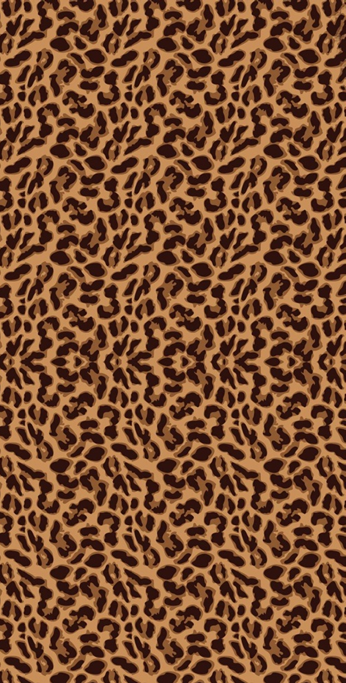
Aren't they cute!!! My favorite one is the chevron one! My mom finally decided on the leopard one as the one she was going to use first. It was fun testing them all out!

Here is the all of them templates I used. You can just copy and paste them into word and add any personalization you want. Also feel free to come up with your own!


And last but not least, a few pictures of our gang from Mother's Day. :)


So cool! I love the anchor cover! =)
ReplyDelete