

Hello Everyone! This is the first of a couple posts over some Valentine's decor that you can make yourself to decorate your house for Valentine's Day! It is very cute and something you will be able to use year after year.
I got this idea here.
Supplies:
Large block of wood (I got mine at Walmart for $8)
Red Acrylic Paint**
White Acrylic Paint
Red Paint Pin (or the color of the base coat you are using)
4 Push Pins
Optional:
-Stencil for Lettering (I got the whole alphabet for $3 at Walmart)
-Rhinestones
TIP: If you want to use this year around, use whatever color you want for the base coat!
To start off, push your push pins into the bottom at each of the four corners of your wood. The pins won't go all the way in, and the wood might be wobbly, but it will be stable enough for you to paint the whole thing. The push pins allow you to paint the sides of your wood without it sticking to your newspaper or whatever you are using to cover your work area.

Next, paint your wood with your red base coat. The good thing about working with acrylic paint is that is dries really quickly. By the time I finished painting the sides of my wood with my first coat, I was able to start my second coat. After the second coat, I went and did something else for about 15-20 minutes and in that time, my wood was dry and ready to go.


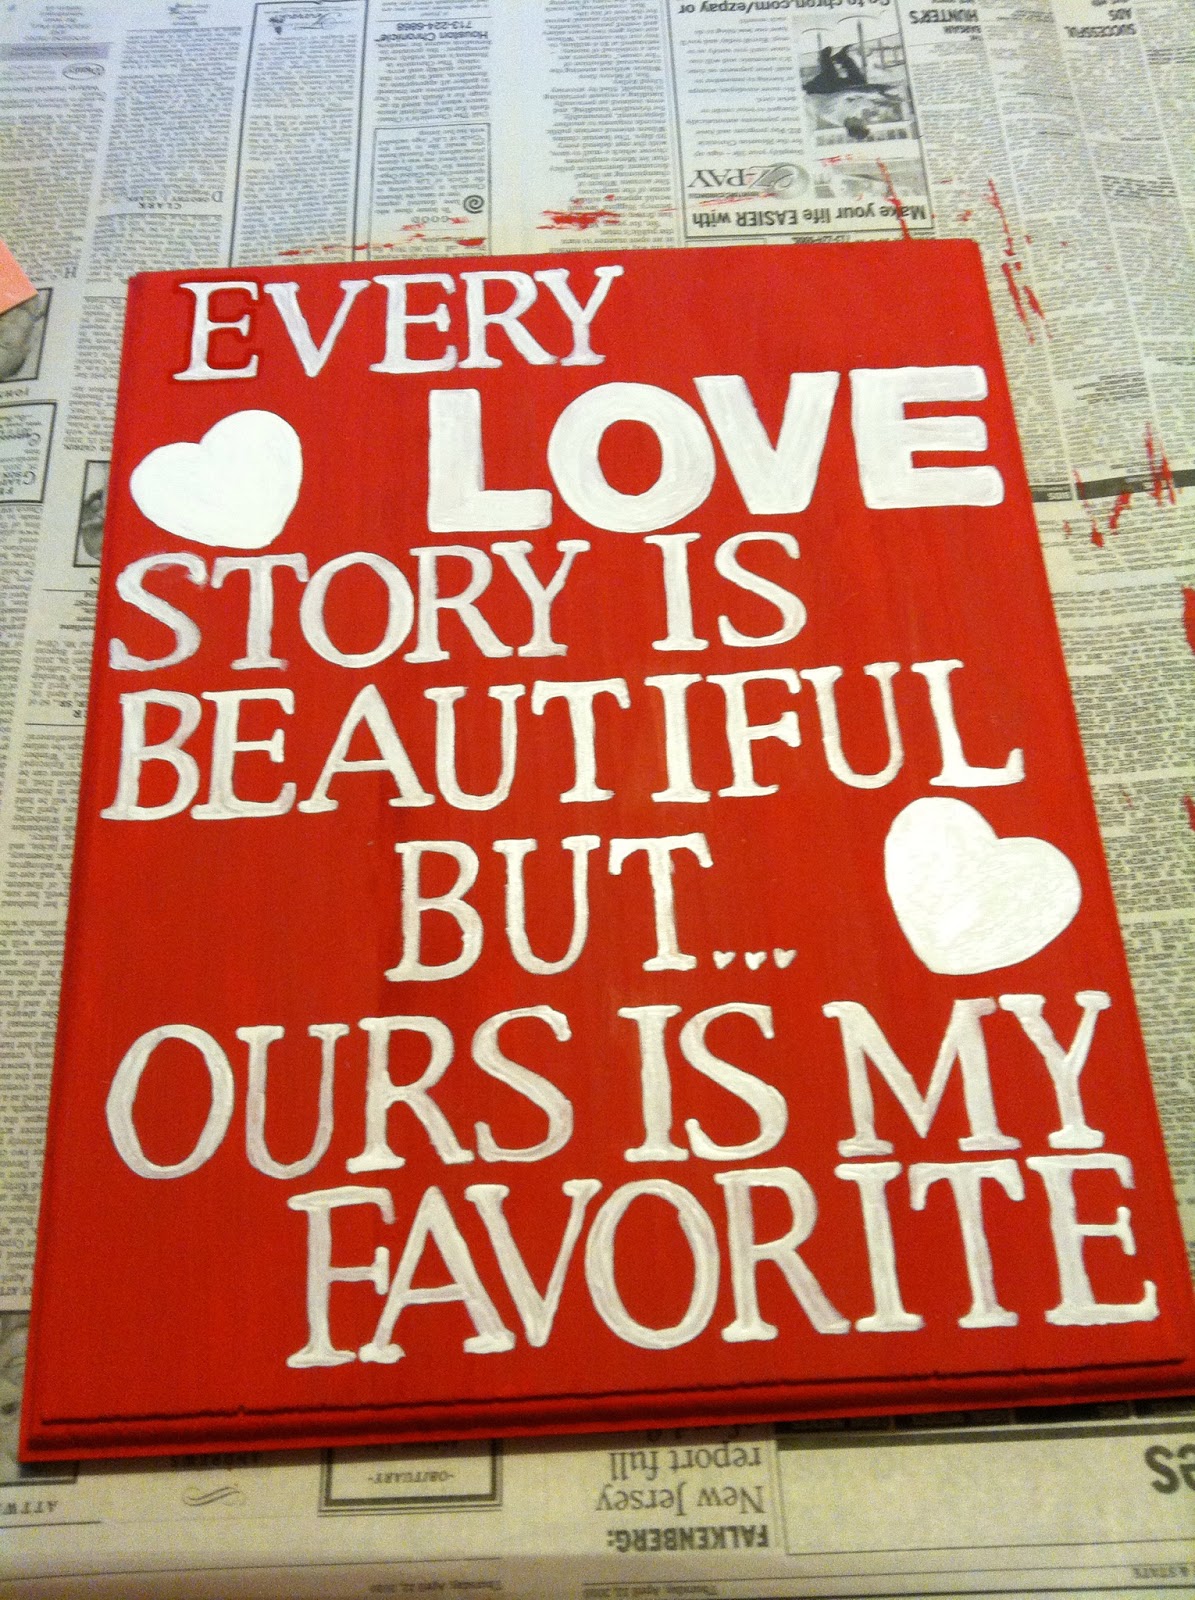
For the next part, pick a saying that you would like to put on your sign. I used "Every love story is beautiful, but our is my favorite." I just felt this captured the official taste tester & I's relationship perfectly. :) Feel free to use this same saying!
Now it's time to write on your wood. I CANNOT write pretty letters at all so I used the stencil. Make sure if you do use the stencil, you plan out your words so that they are even. If you are really good, you can draw your letters on free-handed. If you are REALLY REALLY good you can just go ahead and paint your letters on.


One I stenciled my letters on, I started painting them. I only used one coat for the letters and it looked just fine. Also, don't worry about completely staying in the lines of your stencil (you will see why in a minute!).


I would NOT recommend just painting through the stencil. It seems easier but when I tried it, it looked like this:

One you have your letters painted on, trace them with your paint pen. This makes your letters look cleaner and covers up any imperfections you may have.


One the paint pin dries, you can barely see it!
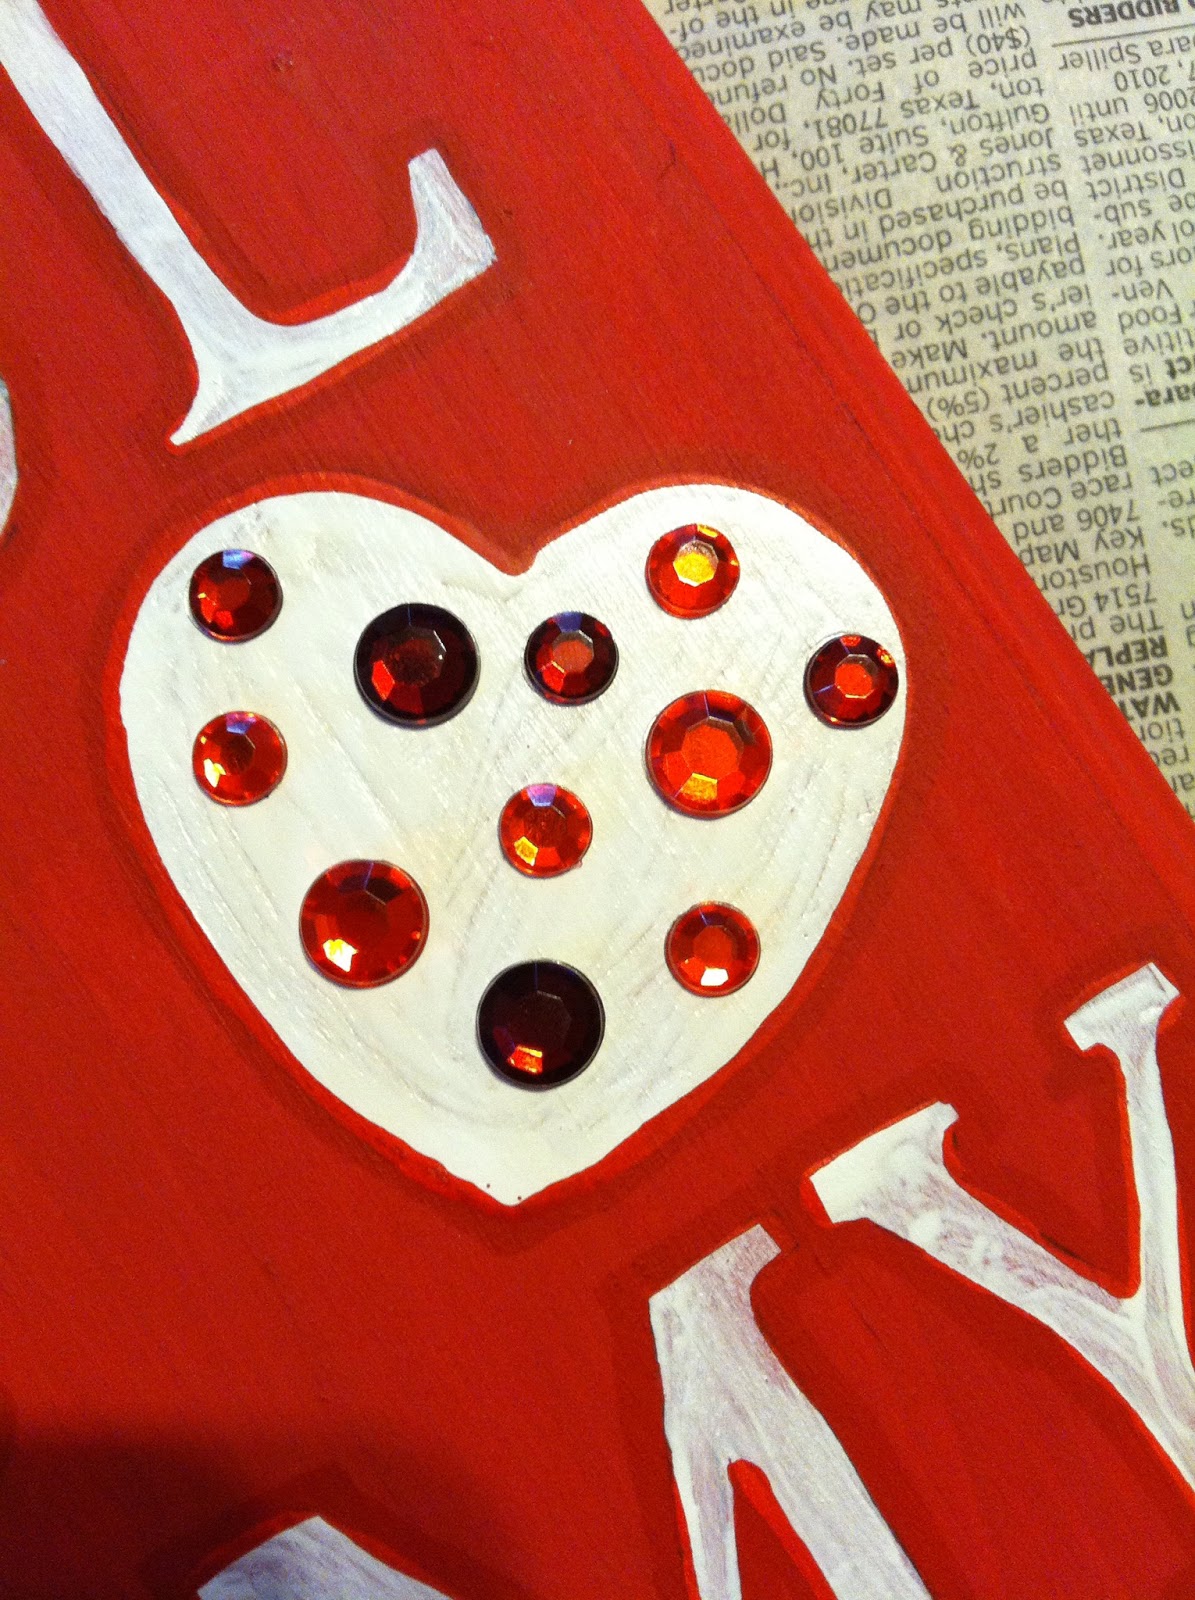
After that, I added a few little embellishments with the red rhinestones just to add a little flare to the sign. I thought it added a nice touch :)
Here is what your finished sign looks like:

You can hang this up on a wall or set it up on a fireplace mantle. Stay tuned for more crafts to help you decorate for Valentine's day! Once I have all of them, I will post a final picture of them all up!
Happy Crafting
& Enjoy!!
perde modelleri
ReplyDeletesms onay
Mobil Odeme Bozdurma
NFT NASİL ALİNİR
ankara evden eve nakliyat
trafik sigortası
Dedektor
web site kurma
aşk kitapları
üsküdar bosch klima servisi
ReplyDeletebeykoz arçelik klima servisi
üsküdar arçelik klima servisi
ataşehir samsung klima servisi
ataşehir mitsubishi klima servisi
kadıköy vestel klima servisi
maltepe bosch klima servisi
kadıköy bosch klima servisi
maltepe arçelik klima servisi