

I LOVE CHEVRON!! Seriously, it's one of my favorite new patterns. Who is with me? Now I know it's Superbowl weekend and I should be giving you a ton of new recipes for your parties BUT I have been on this home decor kick lately and I just had to share. For tips on recipes to use for your Superbowl parties, check out our Recipes tab.
For anyone who has ever tried chevron, you know it can be difficult. Most people tell you to make grids and all this other kind of stuff. Who has the time or patience for that?! I definitely DO NOT. The good news is, the way I am teaching you is very simple and doesn't take very long. Hooray!
Just so you know, I did have a few hiccups along the way with this project. Good news is, I know exactly how to prevent those problems for next time, SO I assure you, you don't have to worry about them! :)
Supplies:
-Wooden Letter of your choosing (Mine was $13 from Hobby Lobby)***
-2 Spray paint colors of your choosing (I used green and white)
-Painter's Tape (I used 1 inch wide)
-An X-ACTO knife (or scissors if you don't have one)
Optional:
-High Gloss for finishing
***Tip: I am obsessed with my "new" last name so I love to put W's all over our house BUT this pattern can be done with anything that tape and paint will stick to, it doesn't have to be a wooden initial!
To start off, spray paint your letter (or whatever you are using) in the base coat. I used white as my base coat because I figured green would paint over white better than vice versa. I definitely recommend using your lighter color as the base.
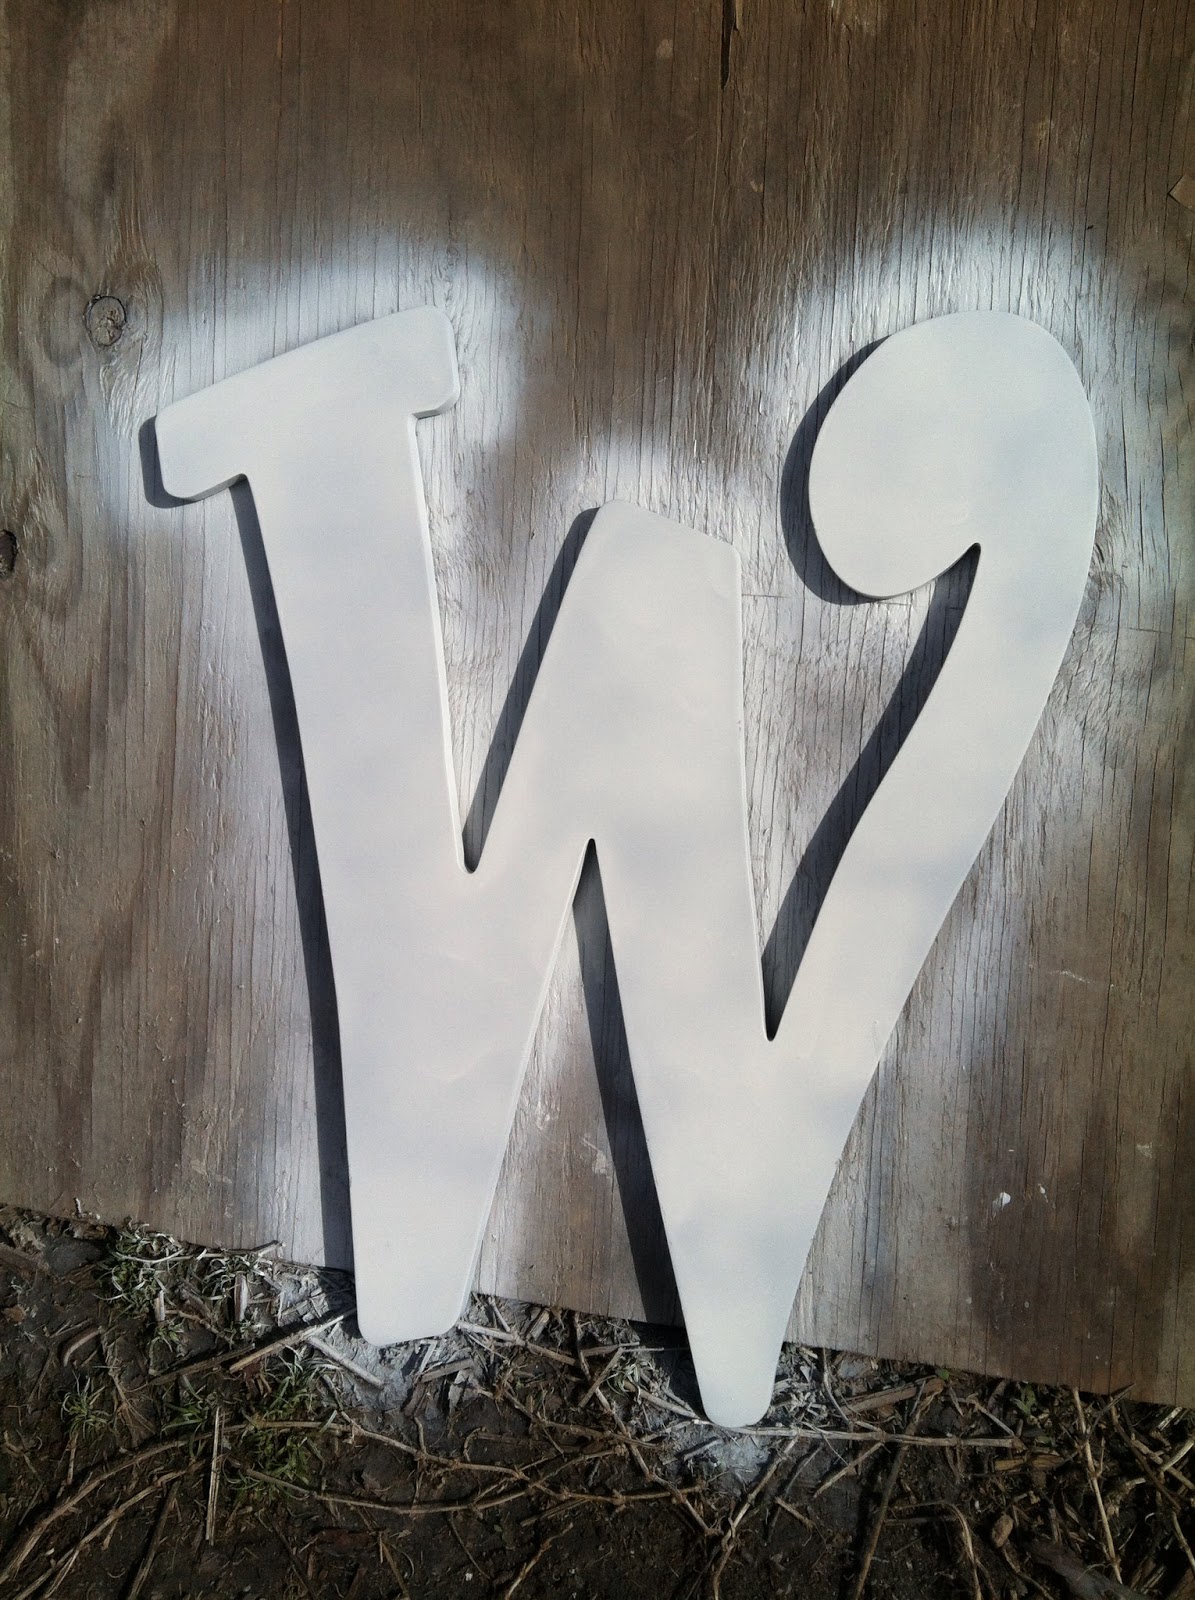
TIP: I HIGHLY recommend using quality spray paint. For my base coat, I used the 96 cent spray paint from walmart and it peeled very badly. The quality spray paint is about $4 a can, but will not peel at all. I used the good paint for the green and it turned out WAY better. You'll see what I mean in the pictures below.
TIP: I painted my letter outside and had to pick some bugs off my paint that flew into it. Try to paint somewhere that doesn't have a bunch of critters!
Ok, back to the tutorial.
Next, let your base coat dry! I only let mine dry for about an hour which was not long enough... I couldn't help it, I just got excited! If you don't let the paint dry, it will peel (see pictures below). If you can, let your letter dry over night!
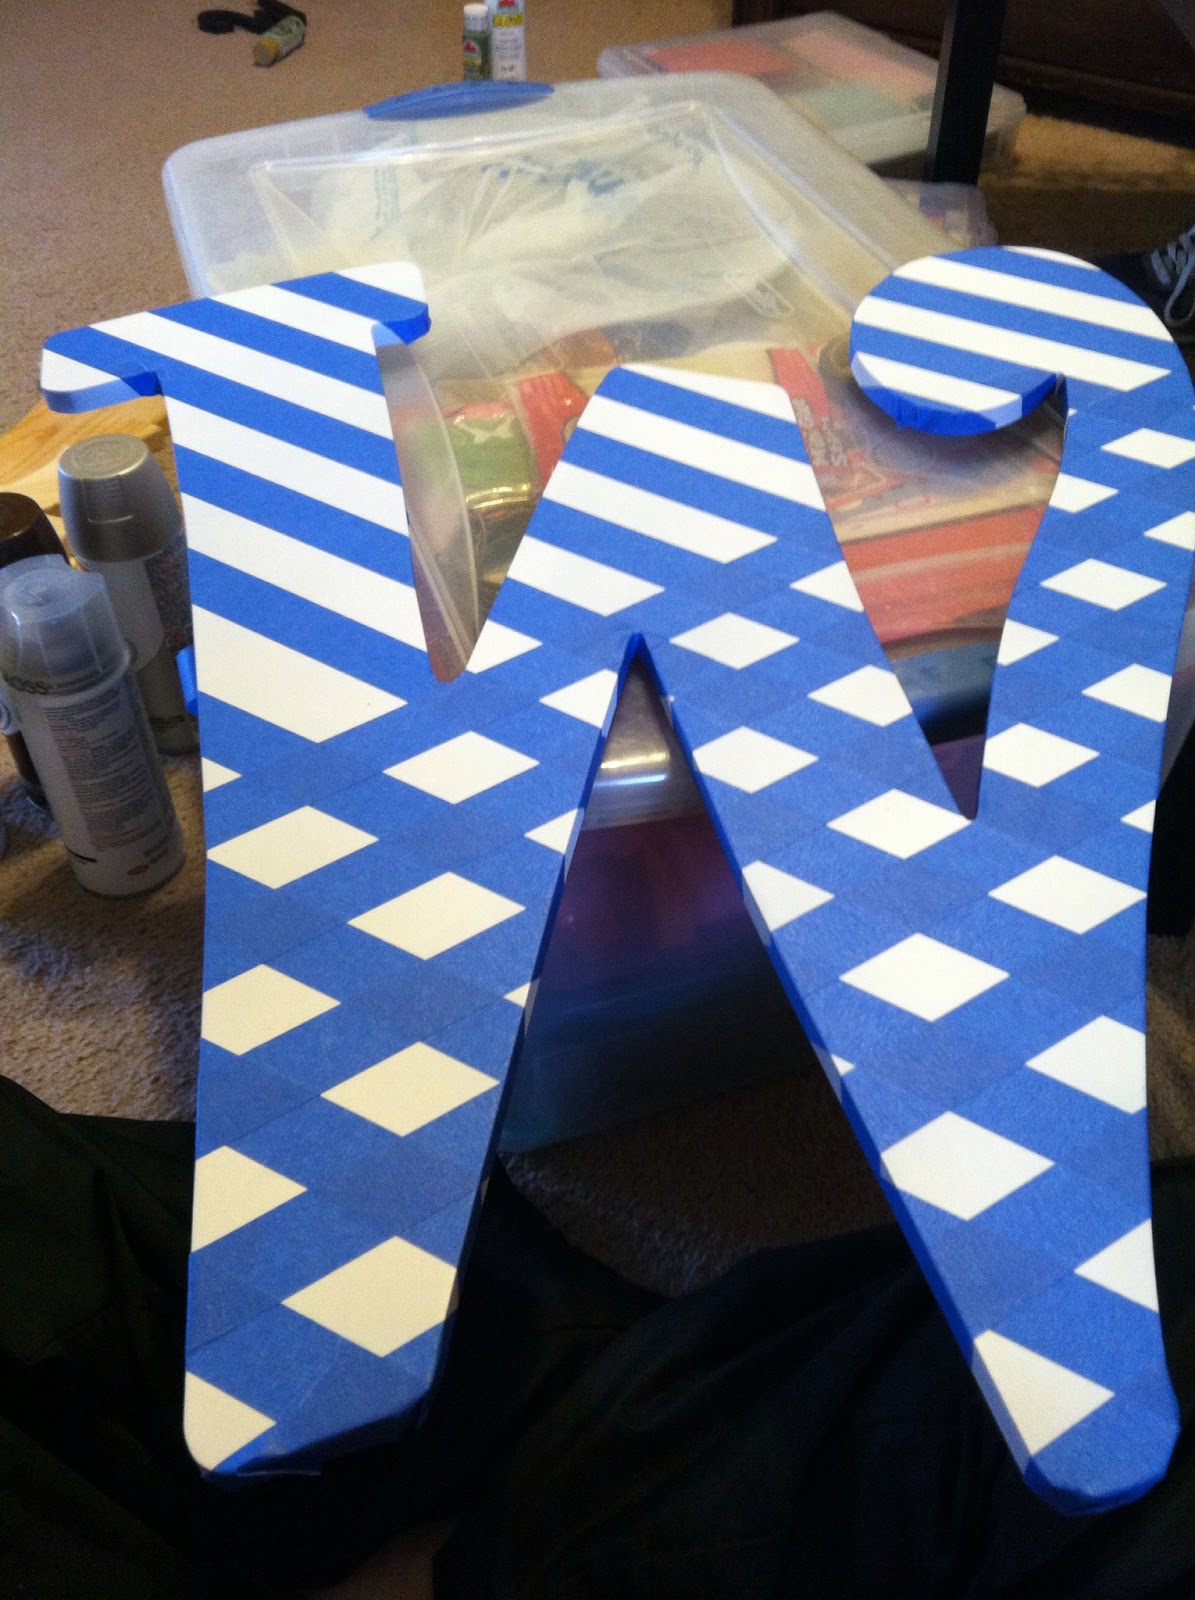
Next, use your painter's tape to make diagonal lines across your letter. Space the tape lines about 1 inch apart, or the width of one piece of tape. You can measure this if you want to but I just eyeballed it and it turned out fine. When the tape went across lines on the letter, I just used one long piece of tape and then cut the tape out of the empty space.


Once you have finished the diagonal lines one way, do the same thing with diagonal lines the opposite way.

I think this looks pretty cool too, but right now we are going for a chevron look!
Now take an X-ACTO knife (or scissors if you don't have one) and cut out the pieces of tape that don't form the chevron pattern.


As you can see, this is where I encountered my peeling. Like I said earlier, use better quality spray paint and let your letter dry longer and this won't happen!
Now, go over your tape to make sure it's pressed down well and then spray your letter with your other color.

Finally, wait for your paint to dry, and peel off the tape! For those of you that didn't use cheap paint AND let your letter dry, this should be all you need to do.

As you can see, I had a little trouble with my white paint. The chevron pattern looks amazing, but I had to do something about those pesky little black spots.
To fix them, I just used some white acrylic paint I had and covered them up with a few coats. It worked very well! Here is a picture a few coats in, as you can see, we are almost there:

AND after a few more coats:

B-E-A-UTIFUL! Also, 10 points extra credit to anyone who got that movie reference.
Here are a few more pictures of my finished Chevron Letter. :) I am so in love with it!!


Happy Crafting
& Enjoy!!!
ALSO, special shout out to my mother in law, Vickie Walker, who is our newest follower!
How cute is this?!?! Totally going to have to do this! I think I will add ribbon strips to the bottom and use it as a bow holder for my girls!
ReplyDeleteThank you!!! Adding the ribbon is an EXCELLENT idea!
DeleteBrandi Morgan that sounds really cute. I've tried many ways and it hasn't worked out. Hopefully this one way will. Good luck to all of you. I'm sure there are plenty of cute ideas in the comments below.
DeleteI am going to show this to my 14 yo daughter. We are going to make these as photo holders by attaching ribbon like the above poster mentioned. She & her friends love hanging pictures around her room. Add a bag of mini clothes pins & you have a personalized inexpensive gift!
ReplyDeleteThat sounds so cute!! Let me know how it turns out!
DeleteSo creative work you have done..Thanks for sharing this information
ReplyDelete